Data is of critical importance in Salesforce because it is the foundation of the entire platform. Salesforce uses data to help businesses understand their customers, track their interactions, and make informed decisions.
Getting data into and out of Salesforce is an important job for any Salesforce Administrator and there are many tools that can be used to make this easier.
Throughout this article, I will cover the tools and processes you will need to become familiar with to safely and effectively import data into and export data from Salesforce.
Table of Contents
Getting Data Into Salesforce

Importing data into Salesforce is a crucial task for businesses that want to make the most of their CRM system. Salesforce offers several ways to import data, including the Data Import Wizard and other third-party tools.
These tools help you import data in common standard objects, such as contacts, leads, and accounts, as well as data in custom objects, which can be useful for businesses and organizations with unique data structures.
Why Would I Need To Import Data Into Salesforce?
There are several scenarios where you might need to import data into Salesforce:
- Migrating from another system: If you are switching from another CRM system to Salesforce, you will need to import your existing data into Salesforce.
- Adding new data: If you have acquired new customers or leads at a recent event (online or offline), you will need to import their data into Salesforce.
- Updating existing data: If you need to update your existing customer or lead data, you can do so by importing a new set of data with the updated information.
- Mass updates: If you need to update a large number of records at once, importing data can be a more efficient way to do so.
- Data cleanup: If you need to clean up your data by removing duplicates or correcting errors, you can export your data, make the necessary changes, and then import the cleaned-up data back into Salesforce.
Preparing Your Data

The data import process in Salesforce involves several steps, including preparing your data, mapping your data to Salesforce fields, and importing the data into Salesforce.
Before importing your data, it is important to clean and prepare your data to ensure that it is accurate and consistent. This may involve removing duplicate records, standardizing data formats, and validating data against business rules.
Excel and CSV files are commonly used to store and manage data. Salesforce allows you to import data from these file formats using the Data Import Wizard or the Data Loader.
When importing data from Excel or CSV files, it is important to ensure that the data is formatted correctly and that any required fields are included.
Data Import Wizard
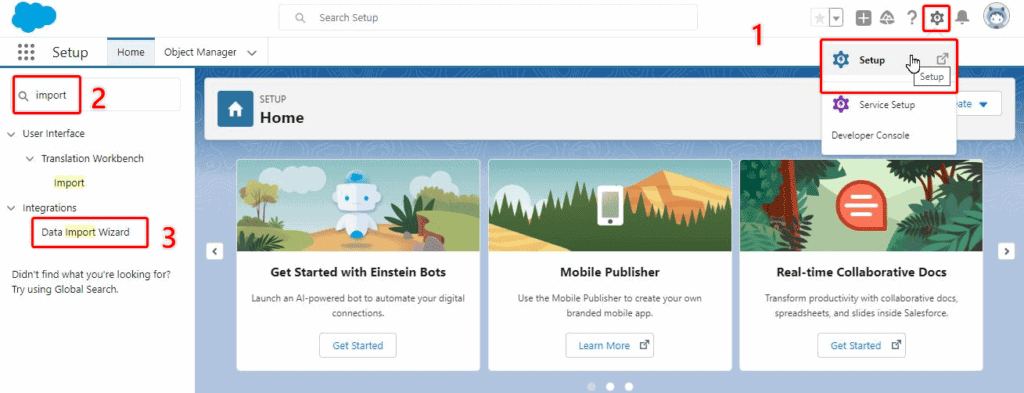
The Data Import Wizard is a web-based tool that allows you to import data into Salesforce from CSV files. It is a simple and intuitive tool that can be accessed from the Setup menu in Salesforce.
The Data Import Wizard is designed to import data into standard objects, such as accounts, contacts, and leads, as well as custom objects.
Salesforce Data Import Wizard has the ability to import new files, update existing files, or both import and update files (upsert) at the same time.
THINGS YOU WILL NEED
Keep in mind, that certain objects will not be available to import if you do not have individual access to those objects.
For example, if you wish to import data relating to Campaigns and Campaign membership, you will not be able to see these objects in Import Data Wizard and configure the import, unless you have the ‘Marketing User’ permissions on your Salesforce user profile.
Data Import Wizard Pros
- Easy to use: The Data Import Wizard has a simple and intuitive interface that makes it easy for non-technical users to import data into Salesforce.
- Supports multiple object types: You can use the Data Import Wizard to import data into standard and custom objects in Salesforce.
- Manages Duplication of Records
- Provides error handling: The Data Import Wizard provides error handling and validation rules that help ensure data accuracy.
- Can be used by users (not just admins)
Data Import Wizard Cons
- Limited functionality: The Data Import Wizard has limited functionality compared to other data migration tools, such as Data Loader or Workbench.
- A maximum of 50,000 records can be imported
- Data Import Wizard does not delete records
Importing Data With Data Import Wizard
To import data using Data Import Wizard, assess Salesforce setup then search for ‘import wizard’ in the quick find box.
Select which object you want to import to, choose the action you will be performing and upload the data set.
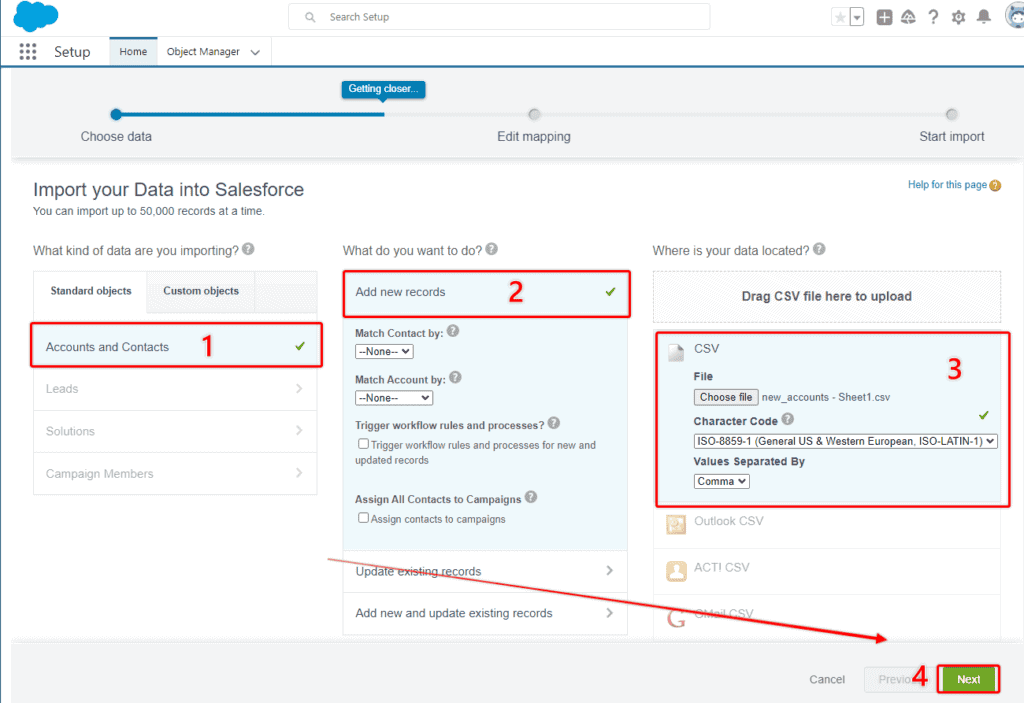
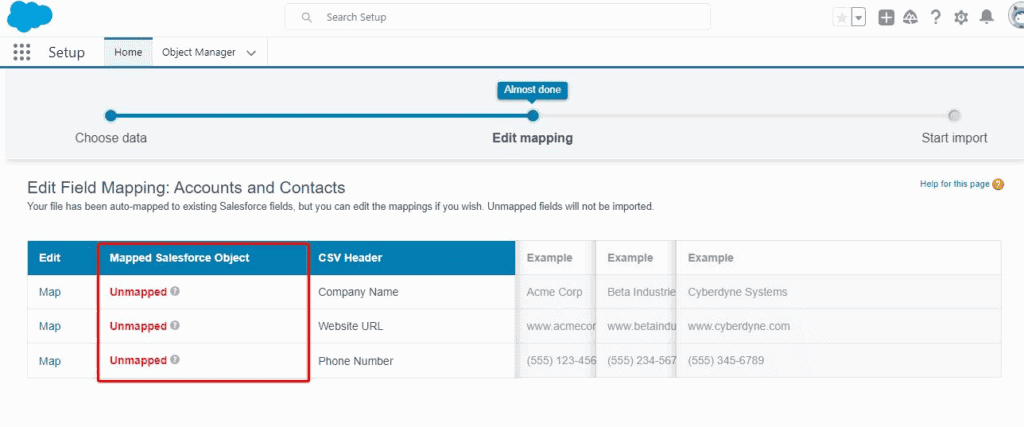
Map the fields from your CSV to the fields of the object and start the import process.
Once the import is completed, you can view the results of the import process to see how many records were imported, and whether any records failed and need follow-up attention.
Data Loader
The Salesforce Data Loader is a powerful tool that allows you to import, update, and delete large volumes of data in Salesforce.
It can be used to import data from various sources, including databases, spreadsheets, and CSV files. The Data Loader is a standalone application that can be downloaded from the Salesforce website and installed on your computer.
Data Loader Pros
- High data volume: Data Loader can handle large data volumes and can import up to 5 million records at a time.
- Supports multiple object types: You can use Data Loader to import data into standard and custom objects in Salesforce.
- Imports can be scheduled
- Can be used to delete records
- Command-line interface: Data Loader also has a command-line interface that allows you to automate data loading tasks.
Data Loader Cons
- Steep learning curve: Data Loader has a steeper learning curve than the Data Import Wizard, and requires some technical knowledge to use effectively.
- Must be installed on the computer- no browser/cloud option
- Does not manage data duplication
- Can only be used by admins
- A maximum of 5 million records can be imported
What is the difference between Data Loader and DataLoader.io?
Data loader is a desktop-based tool that allows users to import and export data between Salesforce and other databases. It is a powerful tool that can handle large amounts of data and supports various data formats.
On the other hand, DataLoader.io is a cloud-based tool that allows users to import and export data between Salesforce and other databases. It is a user-friendly tool that does not require any installation or setup and can be accessed from anywhere with an internet connection. It also supports various data formats and provides advanced features like data mapping and scheduling.
Importing Data With Data Loader
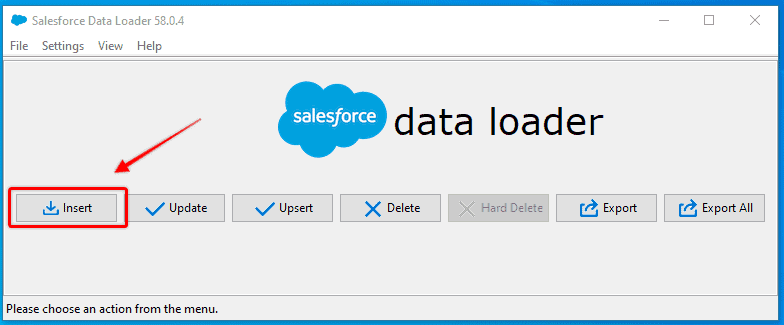
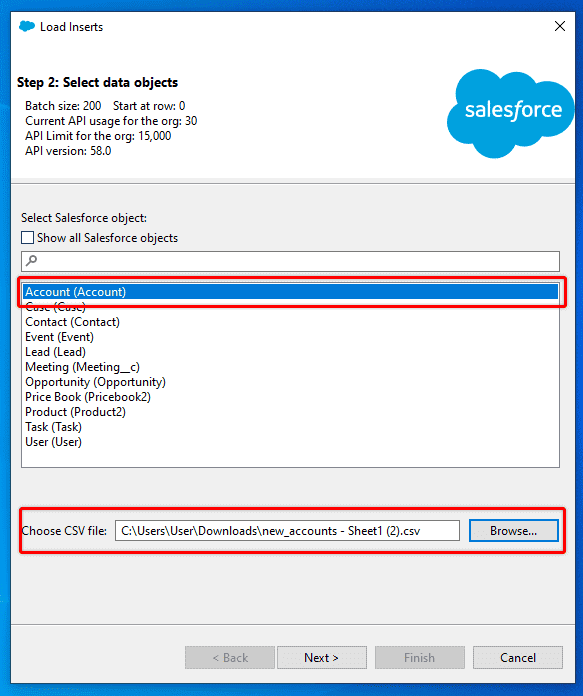
To import data into Salesforce with Data Loader, open the application on your computer, choose Insert and login using the credentials of the Salesforce org you need to import records into.
Select the Object you want to import records into and then upload your CSV file with the new records.
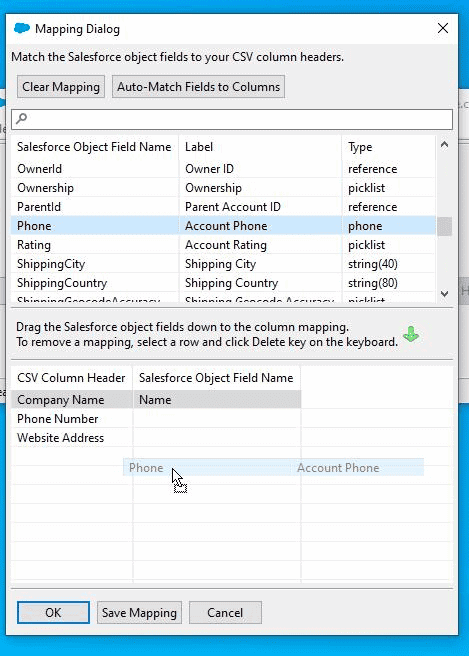
Map the fields from your CSV to the fields of the Object you are importing into and commence the Insert operation.
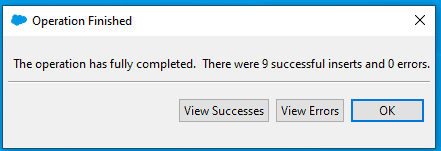
After the insert operation has been completed, double-check the report from the insert action to see how many records were inserted and if there were any errors to follow up on.
Workbench
Salesforce Workbench is a powerful web-based tool for interacting with Salesforce.com. It provides a suite of tools for administrators and developers to interact with Salesforce data using the Salesforce APIs. Workbench allows you to perform various tasks such as data loading, metadata management, and REST API testing.
It is a popular tool for Salesforce developers and administrators due to its flexibility and ease of use. With Workbench, you can perform complex data operations, debug Apex code, and manage Salesforce metadata.
For many users, Workbench is used as a cloud-based Data Loader alternative as some organizations that use Salesforce have strict rules on what applications can be installed on company property (computer) meaning Data Loader is not always usable for them.
Salesforce Workbench Pros
- Supports multiple object types: Workbench supports a wide range of Salesforce objects, including standard and custom objects.
- Provides advanced data manipulation: Workbench provides advanced data manipulation features, such as filtering, sorting, and grouping data.
- Supports REST API testing: Workbench allows users to test REST APIs and view responses in real-time.
- Cloud-based, no installation required
Salesforce Workbench Cons
- Steep learning curve: Workbench has a steeper learning curve than the Data Import Wizard, and requires some technical knowledge to use effectively.
- Not an official Salesforce product, so might not meet some organization’s data security policies
What is the difference between Workbench and DataLoader.io?
While both tools serve the same purpose, Workbench is a more powerful tool that provides a suite of tools for interacting with Salesforce data, while DataLoader.io is a more user-friendly tool that is specifically designed for data migration and integration.
From a pricing perspective, Workbench is free, while DataLoader.io is a paid tool (with a limited free plan).
However, though DataLoader.io is a paid tool, it is developed and supported by Mulesoft (a Salesforce Company), making it an official Salesforce tool, which may be required to meet some organization’s data management and security policies.
Importing Data With Data Loader
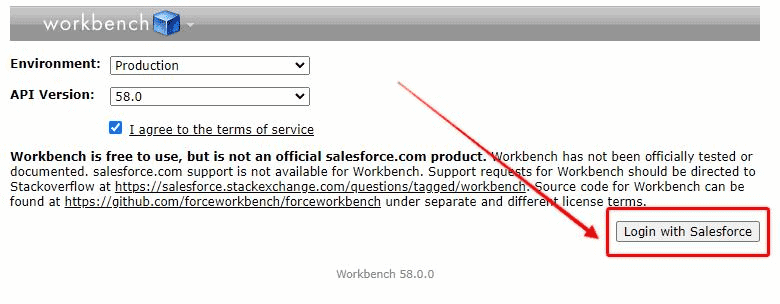
To import new records into Salesforce using Workbench open your web browser, navigate to https://workbench.developerforce.com/login.php, and log in with your Salesforce Org credentials.
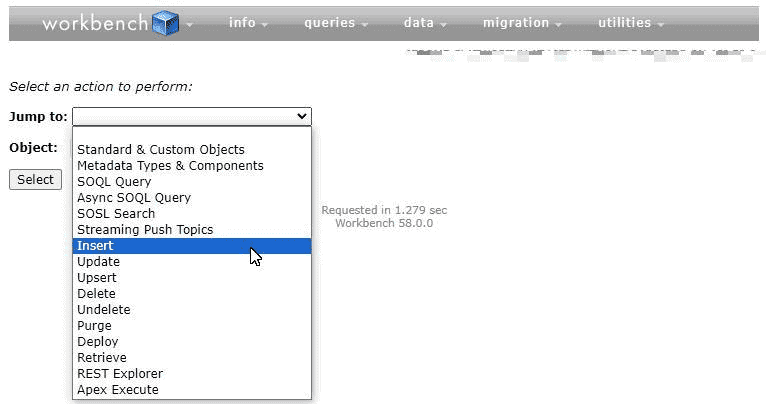
Select ‘Insert’ from the Jump to menu, then choose the Object you want to insert records to and upload the CSV file containing new records.
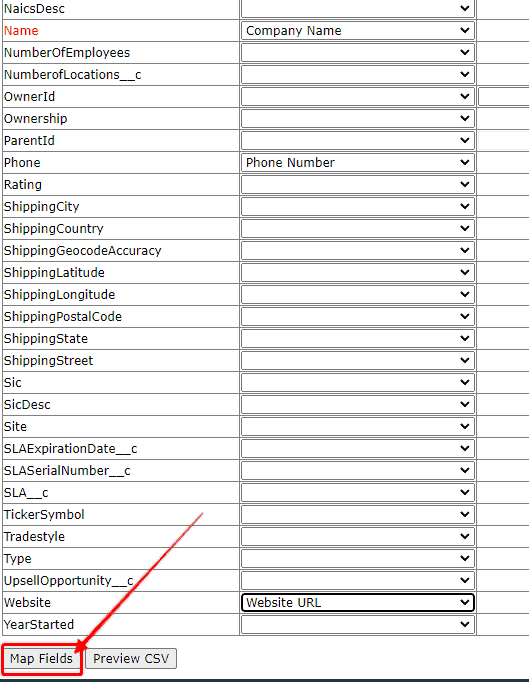
Map the fields from your CSV file to the fields of your destination object and start the import process.
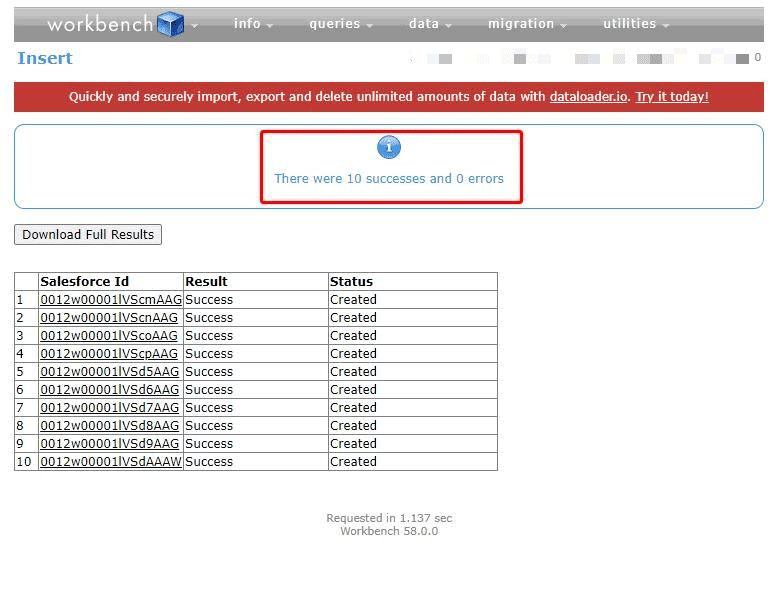
Confirm the import result and follow up on any errors from the insert process.
Third-Party Tools
There are multiple other third-party tools that can be used to import data into Salesforce that have not been described above. Each of these tools has its own specialization but the above tools will provide functionality to meet most of your data import needs.
Getting Data Out of Salesforce

Exporting data from Salesforce is an essential process for any business that uses the platform. Whether you need to back up your data, share it with other systems, or analyze it in external tools, exporting data is a simple and effective way to achieve your goals.
Salesforce offers several options for exporting data, including the Data Export feature, which allows you to download data as a CSV file.
You can also use the Reports feature to create custom reports and export them in various formats, such as Excel or PDF. Additionally, there are third-party tools available that can help you export data from Salesforce in different ways.
Before exporting data from Salesforce, it’s important to understand what data you need and how you plan to use it. You should also consider any data privacy or security concerns and ensure that you have the necessary permissions to access and export the data.
With the right approach and tools, exporting data from Salesforce can be a straightforward and valuable process for your business or organization.
Exporting Data from Salesforce
Exporting data from Salesforce is a straightforward process that allows you to extract data from your Salesforce organization and save it externally for various purposes. The exported data can be used for data backup, analysis, reporting, or migration to other systems.
Salesforce offers two methods for exporting data natively: manual data export and scheduled data export. Both methods allow you to export data in CSV, Excel, or Google Sheets format.
Manual Data Export
Manual data export is a simple and quick way to export data from Salesforce. To export data manually, you need to use the Data Export Service, which is a native Salesforce feature.
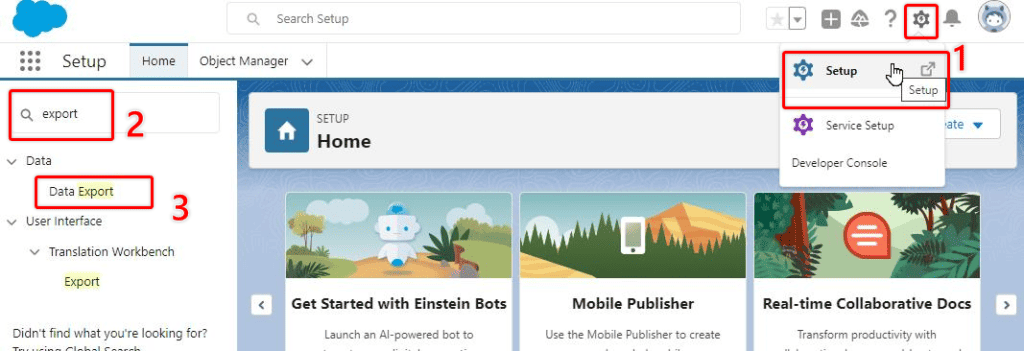
To export data manually, go Setup and search for Data Export in the Quick Find box.
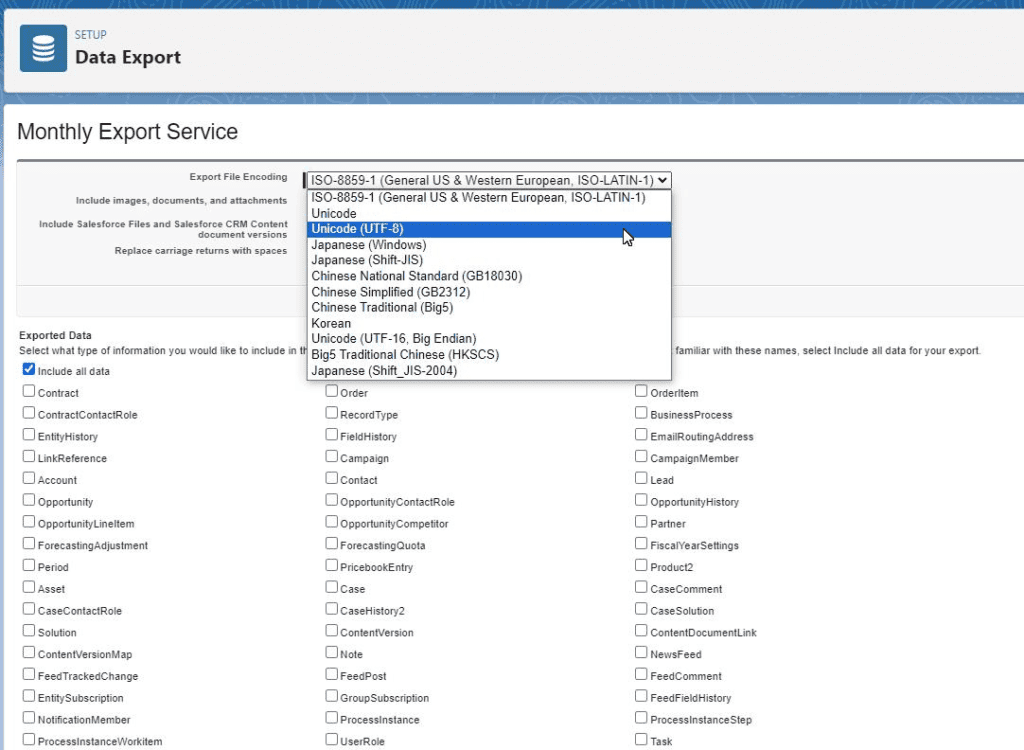
Choose Data Export and select the objects you want to export and the type of export file. The default option will be a widely accepted CSV file.
Select Start Export and wait for the export file to be generated. The amount of time this takes will depend on the amount of data in your Org, and the amount of other exports and data operations the Salesforce is processing at that time.

A zip file will be created which includes CSV files for each object that you elected to include in your export.
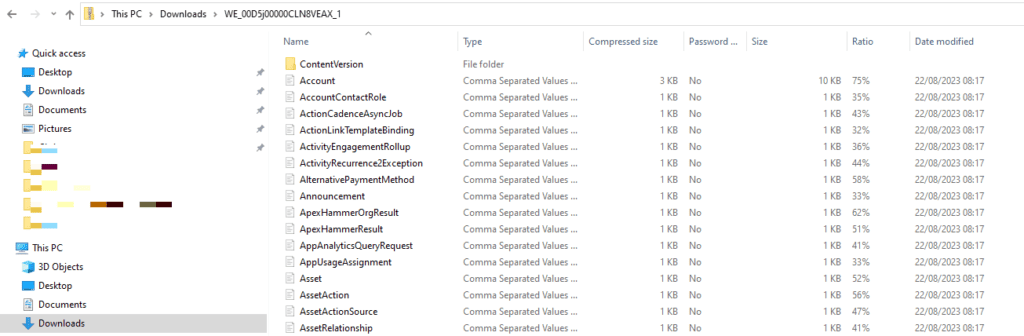
Each file can then be opened, manipulated, and used for whatever purposes you need.

Scheduled Data Export
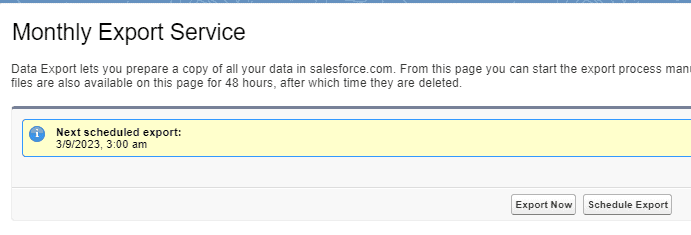
Scheduled data export allows you to automate the data export process and schedule exports on a weekly or monthly basis. Scheduled data export is useful for organizations that need to export data regularly for backup or reporting purposes.
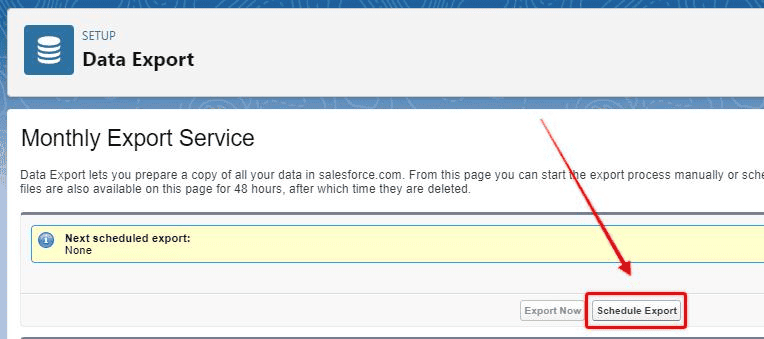
To set up scheduled data export go to Setup and search for Data Export in the Quick Find box.
Choose Schedule Export.
Configure the preferred details of your export (file type, export frequency, included objects, etc.) and select Save.
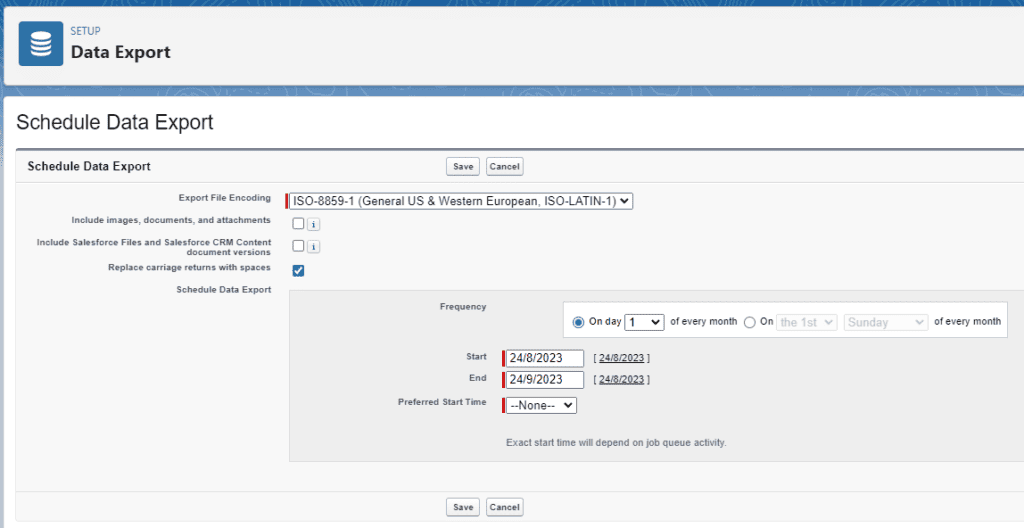
If your scheduled export has been saved successfully you will see a message confirming your next scheduled export. To access your export file once it has been automatically created, you will need to access the Data Export area of Setup (where you configured the Scheduled Export), and download the file to your computer, other other network location.
Exporting Data from Salesforce Reports
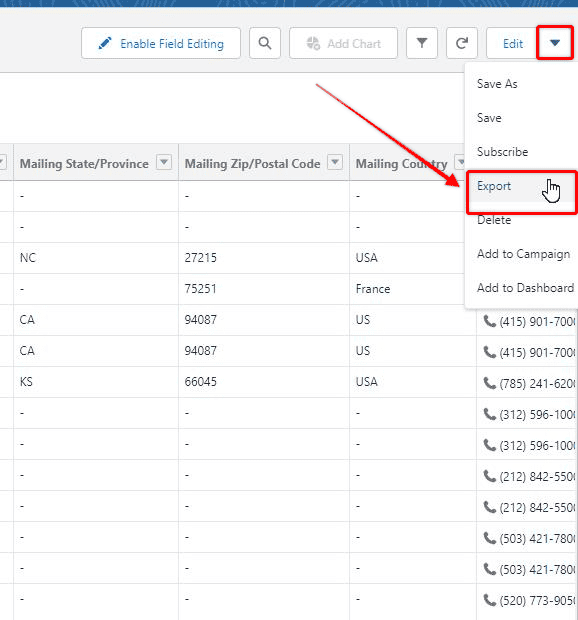
You can export data from Reports following these steps:
Navigate to the report you want to export data from and choose Export from the top right-hand corner of the interface.
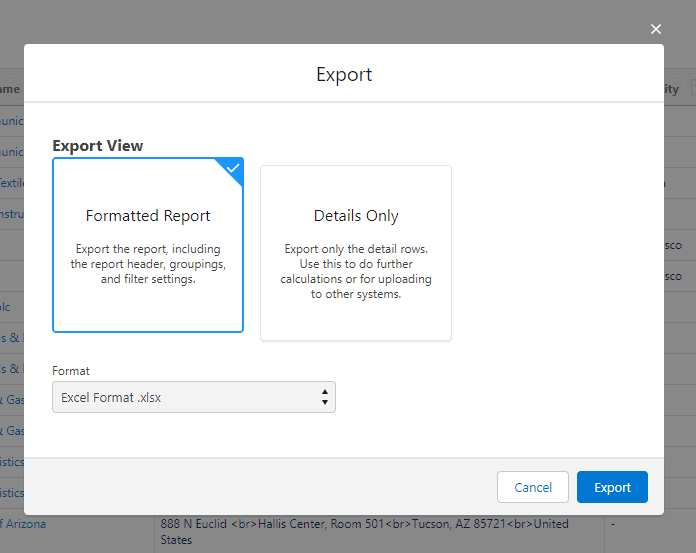
Choose the type of export you want. Choosing ‘Formatted Report’ will create an Excel file (.xlsx) whereas selecting ‘Details Only’ will create a CSV file. Select Export once you have chosen the type of file you want.
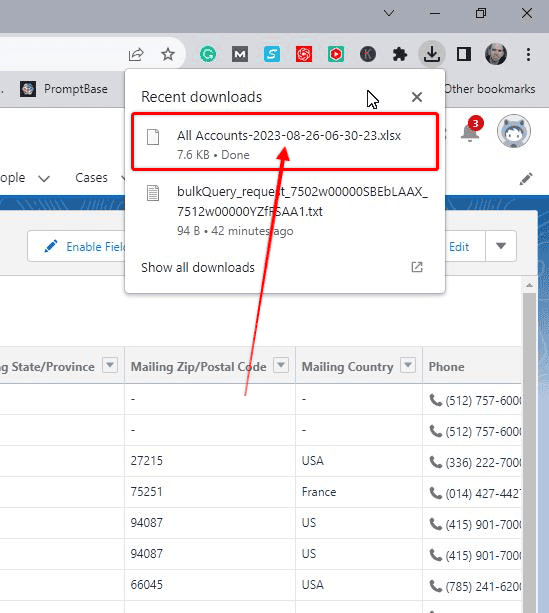
Once the export process is complete, you can download the Excel file and open it in Microsoft Excel or a similar program.
It is important to note that the exported data may not include all the fields or records in the original Salesforce object, depending on the export options you choose.
Additionally, the exported data may not be formatted exactly as it appears in Salesforce, so some manual formatting may be required.
KEY CONCEPT
The ability to export data from a Salesforce report is a user permission that can be turned off to enhance data security if that is desired by your Organization.
So if someone wants to, or is trying to export data from a Salesforce Report, and cannot find the option in their Reports interface, they may not have the appropriate permissions (Export Reports) allocated to the profile.
Utilizing Salesforce Rest API
If you have advanced coding skills or access to someone with advanced coding skills you can utilize the Salesforce REST API. REST API is a simple and powerful web service that allows you to interact with Salesforce data. It is based on the HTTP protocol and uses standard HTTP methods such as GET, POST, PUT, and DELETE to interact with resources.
The REST API supports a variety of data formats, including JSON and XML. You can specify the data format you want to use by setting the Accept header in your API requests. The REST API also supports batch requests, which allow you to submit multiple API requests in a single HTTP request.
Exporting Salesforce Data With Workbench
Salesforce data can be exported and manipulated with a free online tool called Workbench.
Workbench is accessed at this URL (https://workbench.developerforce.com/login.php).
You then log in using the credentials of the Salesforce Org and construct a SOQL Query to export the desired information.
Exporting Salesforce Data With Data Loader
Salesforce data can similarly be exported with Data Loader.
However, Data Loader is a program that you download onto your local machine (your computer), rather than access a cloud-based app.
Once you install Data Loader, select Export, to connect to the relevant Salesforce Org that you want to download data from, and configure the data you want to export.