Workbench is a web-based tool that enables Salesforce administrators and developers to interact with Salesforce.com.
It offers a range of tools, including data export, that allow users to work with Salesforce data using the Salesforce APIs.
Workbench can be accessed via this URL (https://workbench.developerforce.com/login.php). You do not need an account for the tool, as you log in using the Salesforce credentials of the Org that you wish to work on.
There is nothing you need to install on your computer, it is a cloud-based program.
IMPORTANT
Please keep in mind that Workbench is not an official Salesforce.Com product, and though many users use it on Production Orgs, it is not currently intended to be used with Production Orgs (see this notice from the Workbench team: https://workbench.developerforce.com/about.php).
Follow these steps to export data from Salesforce using Workbench:
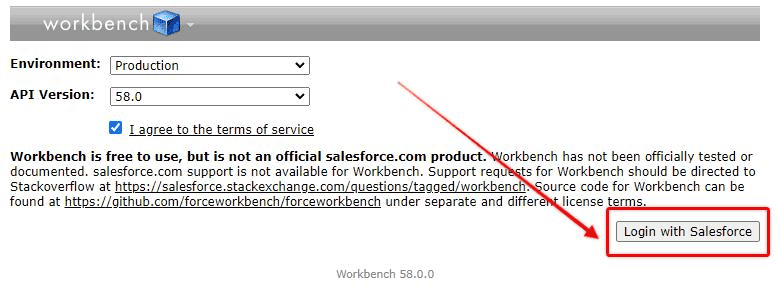
1. Login To Workbench
Go to https://workbench.developerforce.com/login.php, choose whether you are logging into a Production or Sandbox environment, agree to the terms of service, and select Login With Salesforce.
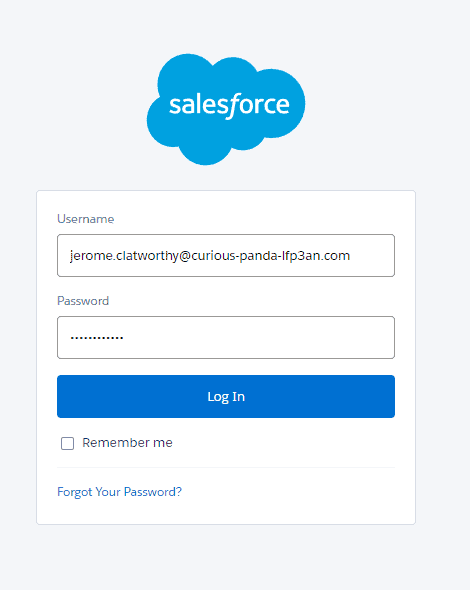
Enter the username and password of the relevant Org and select Login.
RELATED RESOURCE: Getting Data In And Out of Salesforce
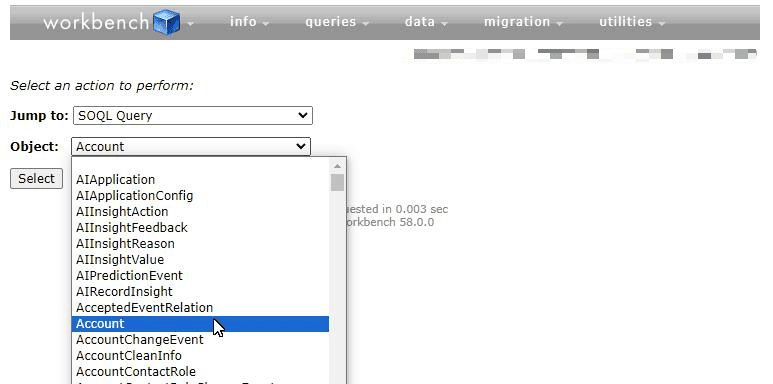
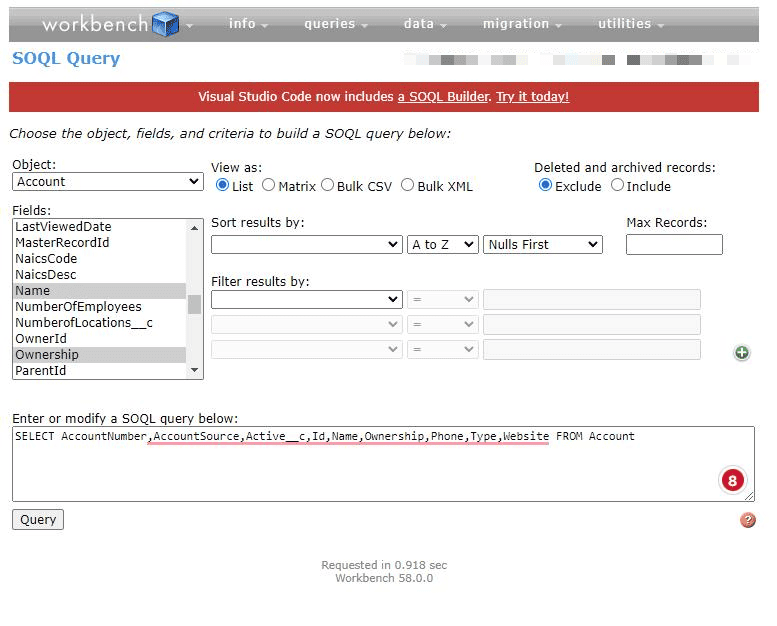
2. Configure SOQL Query
In Workbench, there is no ‘Export’ feature per se, because exporting data is done via a SOQL Query. The tool helps you build the SOQL Query that you configure to get access to the data you want and need, and you then export it.
For demonstration purposes, I am going to export a list of all Accounts on a Trailhead Playground Org.
On the Jump To menu, select SOQL Query.

For Object, select Account.
Use the Workbench interface to configure the fields you want to be included (configure multiple fields by holding down Ctrl and selecting the fields you want), choose whether to include or exclude archived records, how you would like the records sorted, and if you would like the filter them based on the values of certain fields.
As you configure the different options you will see the SOQl query grow in the box at the bottom of the screen.
You can choose to just type a SOQL query directly into this box if preferred, or use the configuration options to generate it, or a combination of both.
RELATED RESOURCE: Import Data With Workbench
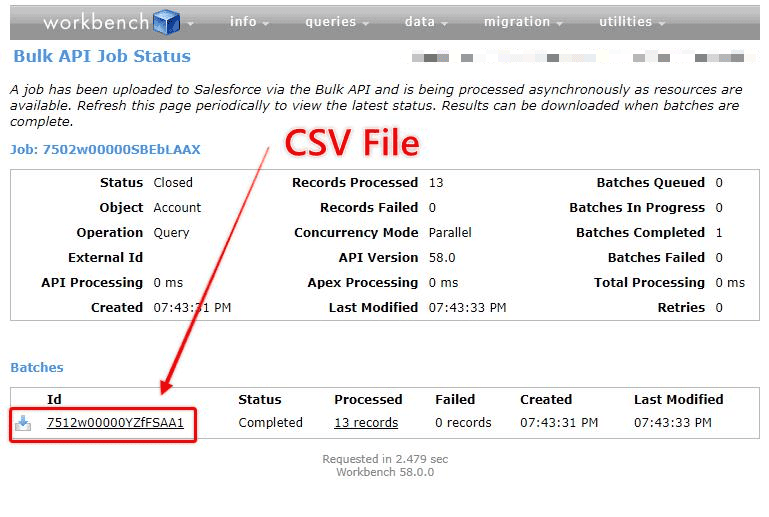
3. Run SOQL Query
Press Query.
If you choose to view it as a list, then a list of the included records will appear directly on the screen beneath the SOQl query builder interface.
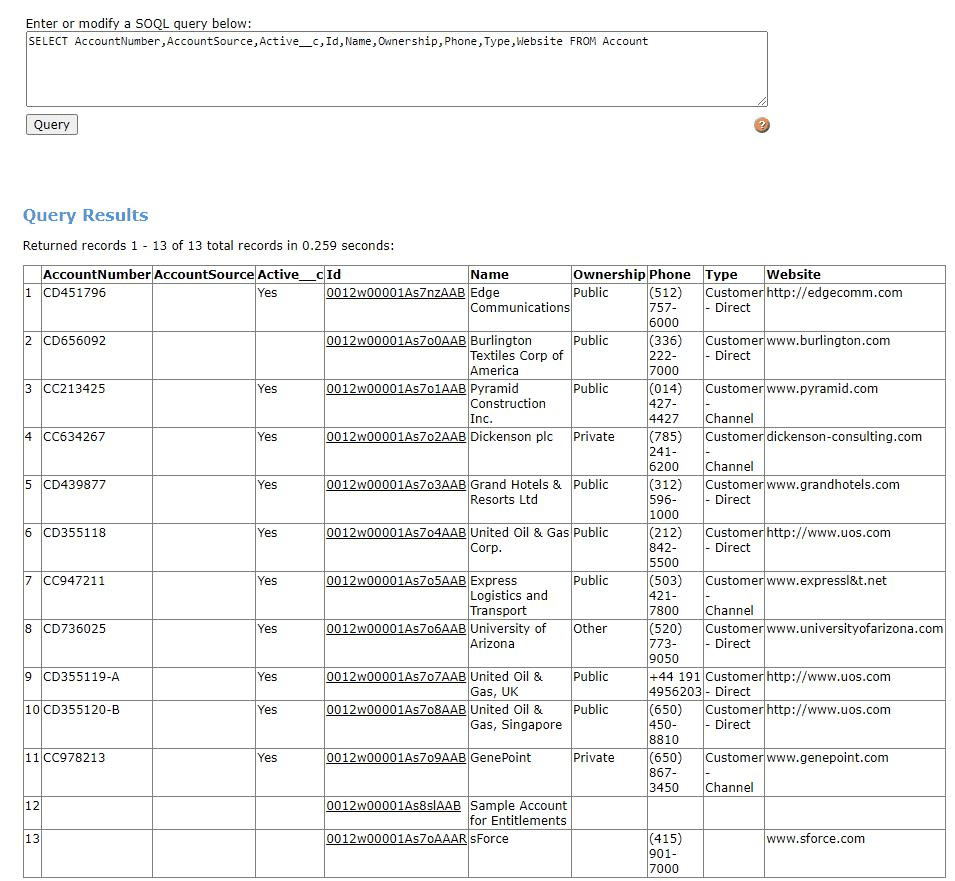
But, if you want a CSV file you can then manipulate and use for another purpose, choose the Bulk CSV option.