Anyone who works with Salesforce will need to have a working understanding of Objects.
They are the core foundation on which Salesforce and its data structures are built.
In this article, I will explain the basic principles regarding Salesforce Objects, the difference between standard and custom objects, how to create a new one, and much more.
Table of Contents
What is an Object?
In Salesforce, an object is a database table where data is stored. It represents a specific type of data, such as accounts, contacts, leads, or opportunities.
Objects are used to organize data into a structured format, making it easier to manage and analyze. Each object has a set of fields that define the data that can be stored in it, and each field has a specific data type and properties that determine how the data is stored and displayed.
Objects can also have relationships with other objects, which allows for more complex data modeling and reporting.
The easiest way to understand an Object is to visualize it as a spreadsheet. At its core, an Object is like a single tab of a spreadsheet. Each column of the spreadsheet is a ‘field’ on a Salesforce object, and each row of data is a Salesforce record.
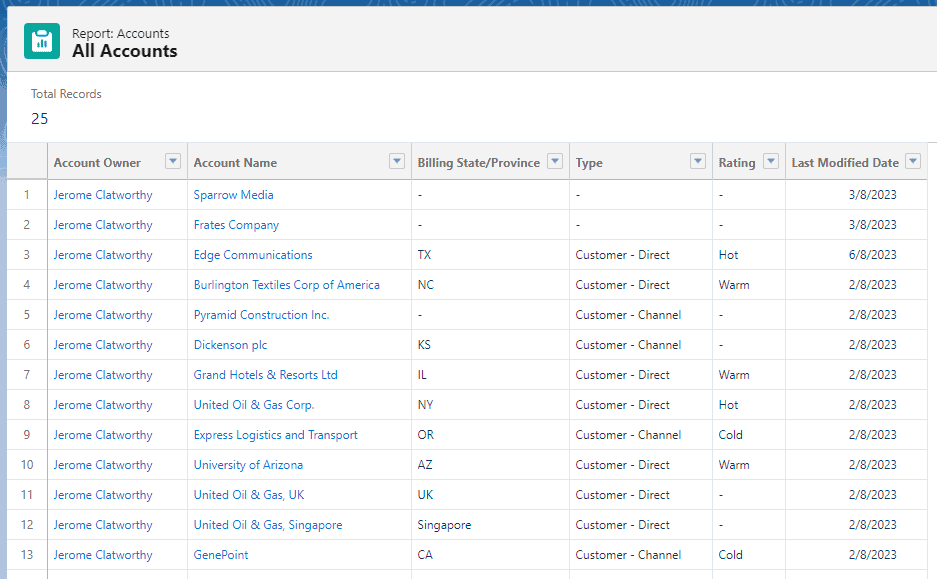
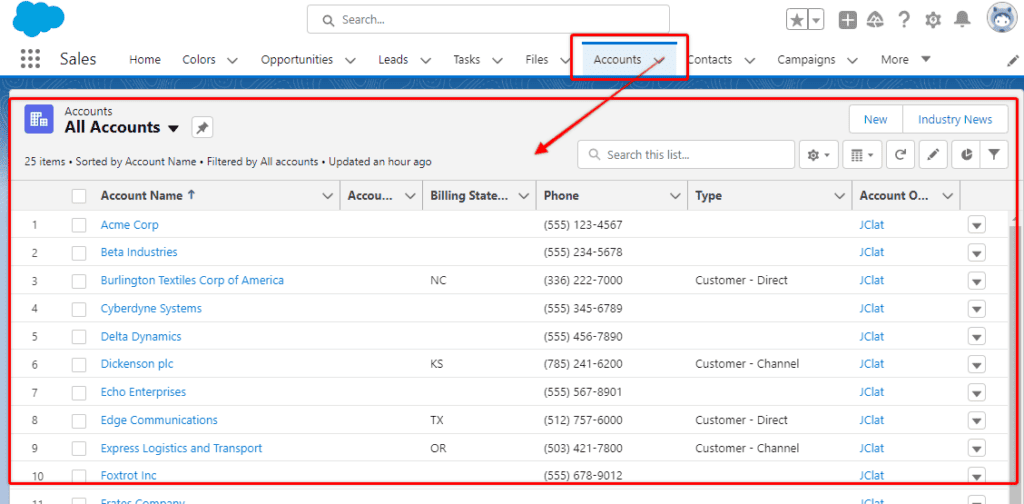
For example, the below image shows a report of the Account object. Each of the columns (Account Name, State, Type, Rating, etc.) are fields on the account object, and each of the accounts listed is a Salesforce ‘record’.
To visualize this data set as a spreadsheet, I exported this report and imported it into Google Sheets, and this is what it looks like:
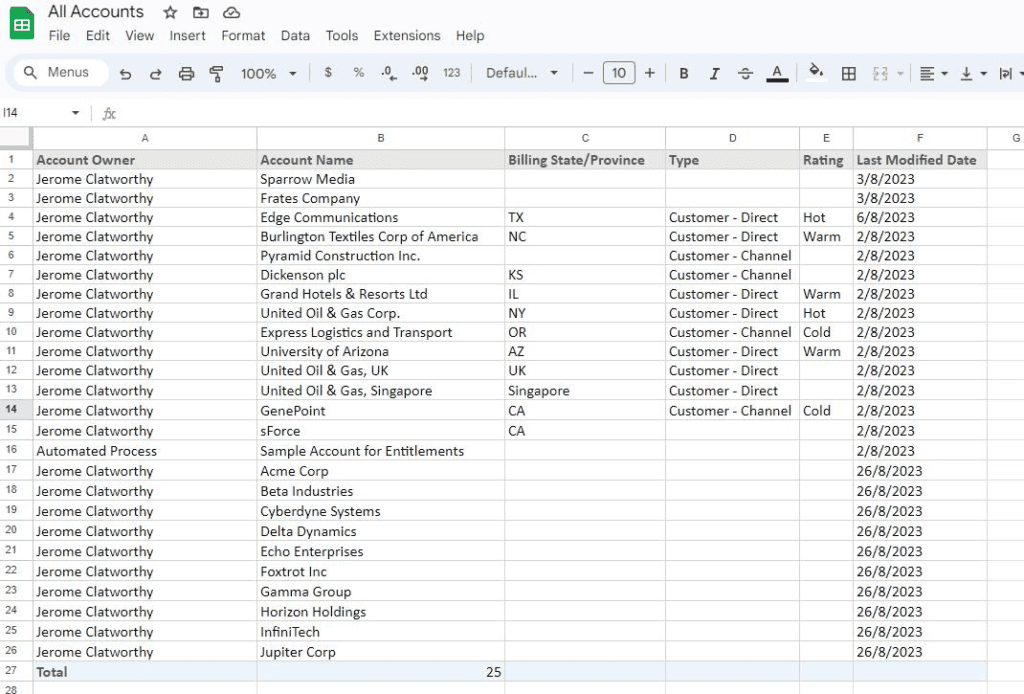
The above side-by-side comparison makes it easier to understand the relationship between Salesforce Objects and spreadsheets.
The power of Salesforce comes in its ability to house different Objects and create relationships between them, hence the term ‘relational database‘.
Standard vs. Custom Objects

In Salesforce, standard objects are pre-built objects that come with the platform, while custom objects are objects that are created by users to store data that is unique to their business processes.
Standard objects are the core objects that are used in most Salesforce implementations, including accounts, contacts, leads, opportunities, and cases.
They have predefined fields and relationships, and their functionality is built into the platform, so they can’t be deleted or modified in the same way that custom objects can be.
Custom objects, on the other hand, are created by users to store data that is specific to their business processes. They have customizable fields and relationships, and their functionality can be tailored to meet the specific needs of the organization.
Custom objects can be created from scratch or by copying an existing object, and they can be modified or deleted as needed. You can even create a new object by importing a spreadsheet.
Given the similarities in data structure, Salesforce is able to automatically determine the object fields (from column heading), and import records (rows of the spreadsheet) simultaneously.
Object Relationships

In Salesforce, there are several different ways that objects can be related to each other. The ability to Objects relate to each other and see each other’s data is one of the features that make Salesforce such a powerful platform.
Here are the most common types of relationships:
- Lookup Relationship: This type of relationship allows one object to reference another object. For example, an Opportunity object may have a lookup relationship to an Account object, indicating which account the opportunity is associated with.
- Master-Detail Relationship: This type of relationship is similar to a lookup relationship, but it has additional features such as roll-up summary fields and cascading deletes. In a master-detail relationship, one object is the master and the other object is the detail. The detail object can only exist if it has a master record.
- Many-to-Many Relationship: This type of relationship is used when multiple records of one object can be associated with multiple records of another object. Many-to-many relationships are implemented using a junction object, which serves as a bridge between the two objects.
- Hierarchical Relationship: This type of relationship is used when one object is related to another object in a hierarchical structure. For example, the User object in Salesforce has a hierarchical relationship with itself, indicating the reporting structure within an organization.
- External Lookup Relationship: This type of relationship allows a Salesforce object to reference a record in an external system, such as a record in a database or a file. External lookup relationships are created using the External ID field on the object.
These different types of relationships allow Salesforce users to create complex data models that accurately reflect their business processes and relationships between data.
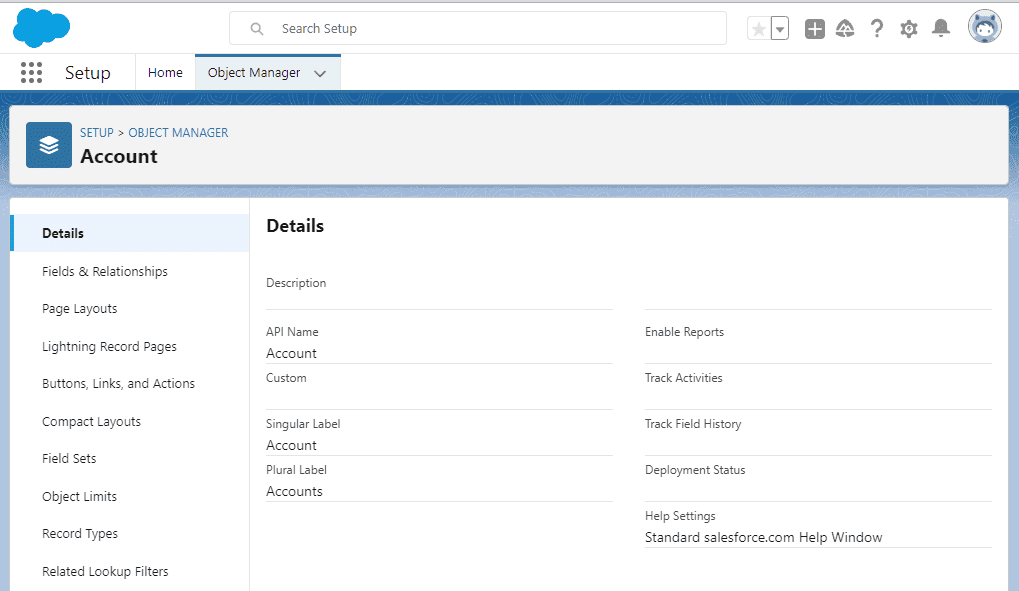
Object Manager
Salesforce Object Manager is a tool within the Salesforce platform that allows users to create, modify, and manage custom objects and standard objects.
It provides a graphical user interface (GUI) that enables users to define fields, relationships, and other settings for objects, as well as manage object-level security, validation rules, and other features.
The Object Manager is an essential tool for Salesforce administrators and developers, as it allows them to customize the platform to meet their organization’s specific needs.
With the Object Manager, users can create custom objects to store data that is unique to their business processes, as well as modify standard objects to add or remove fields, change field types, or update other settings.
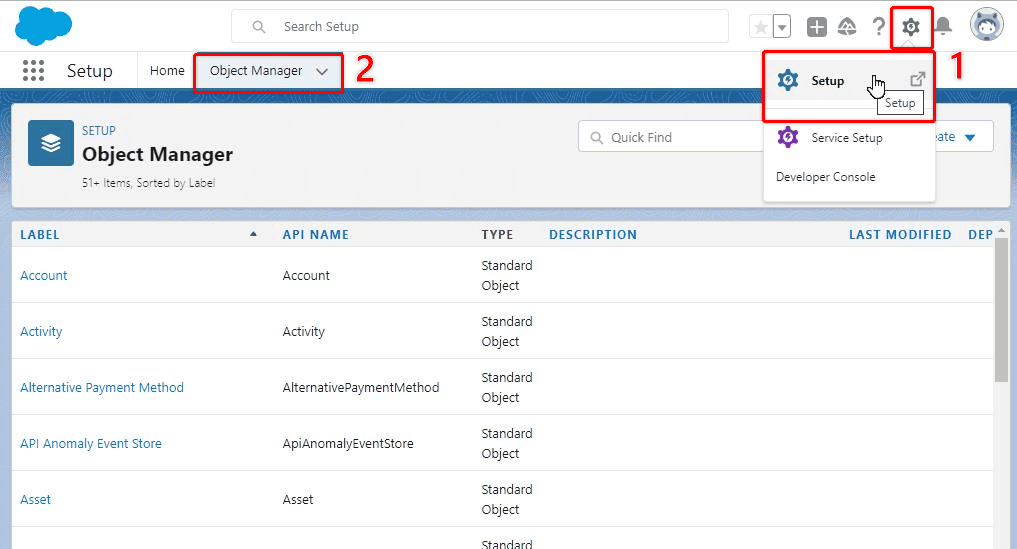
Object Manager can be accessed in two main ways. One way to access the Object Manager is by selecting the gear icon, open Setup, and then choose Object Manager.

The other way to open (and the quickest) the Object Manager is to navigate to the object you would like to edit in the Salesforce user interface, select the gear icon, and choose Edit Object.
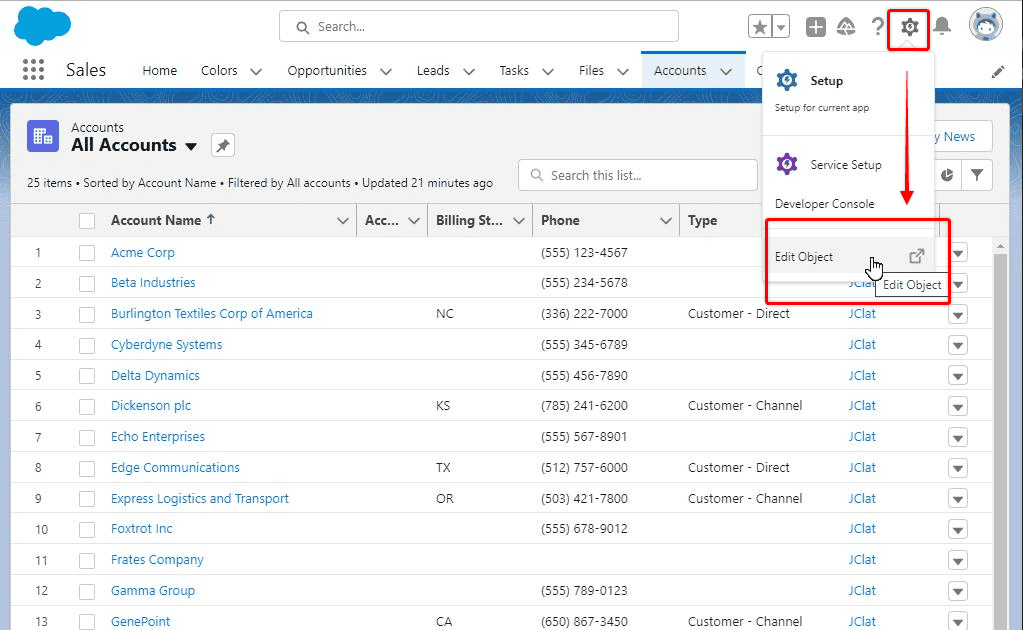
The Object you are on will then be opened inside the Object Manager ready to be worked on.
Creating a New Salesforce Object
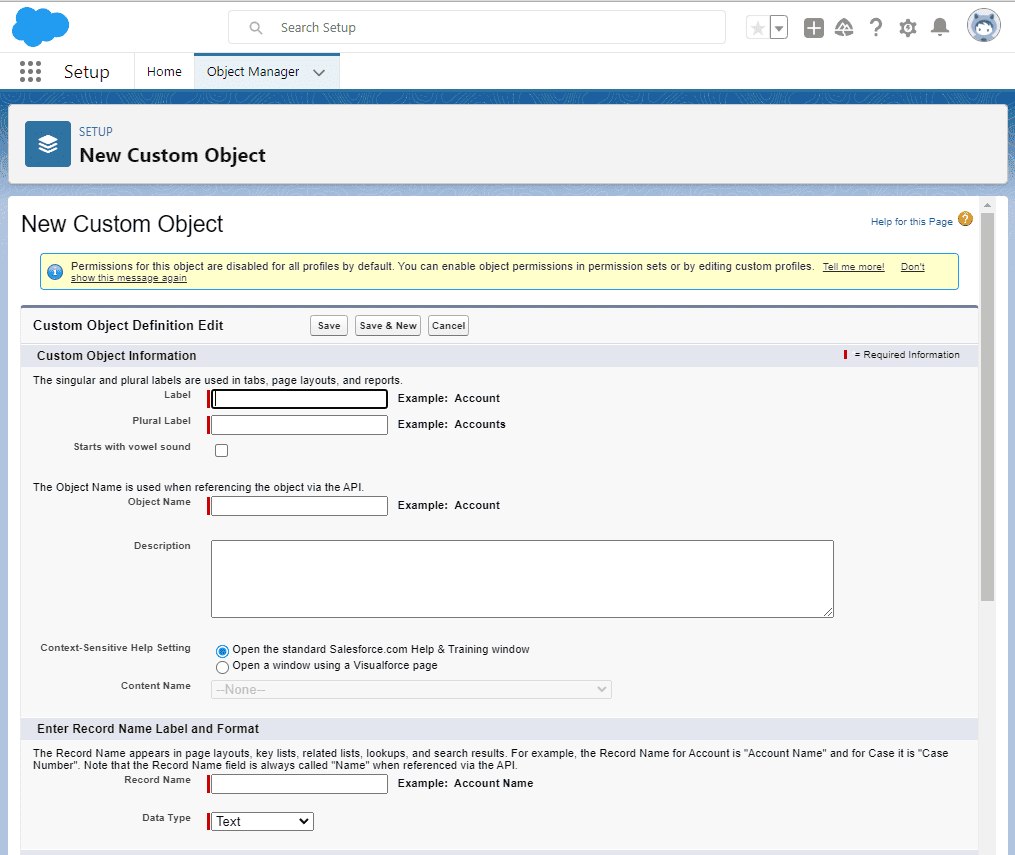
To create a new Salesforce Object, open Salesforce Setup and navigate to the Object Manager.
Select Create, then Create New Object. We previously discussed the possibility of creating a new Object using a spreadsheet, but that won’t be covered in this tutorial. I will focus on the Standard process for creating a Custom Object.

The New Object Wizard guides you through the required information needed to set up a new Object including label, name, description, and more.
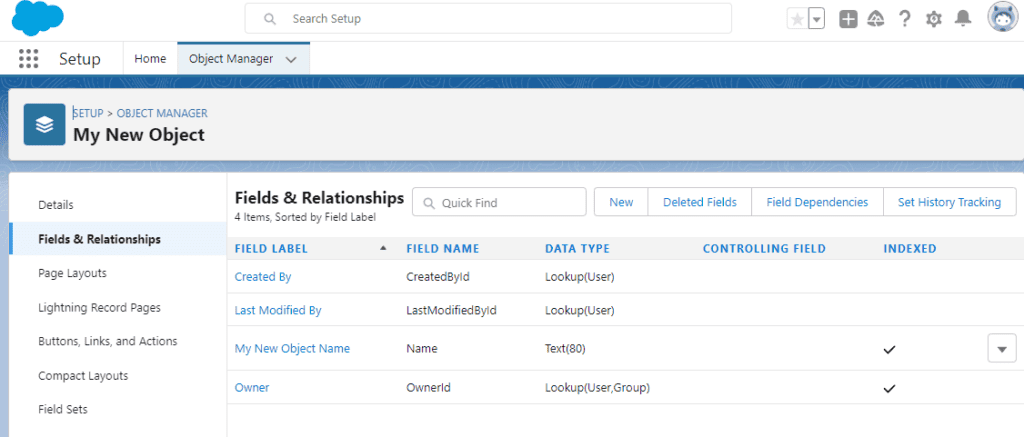
Once the relevant information has been provided, your new Object will be created, and ready for further configuration.
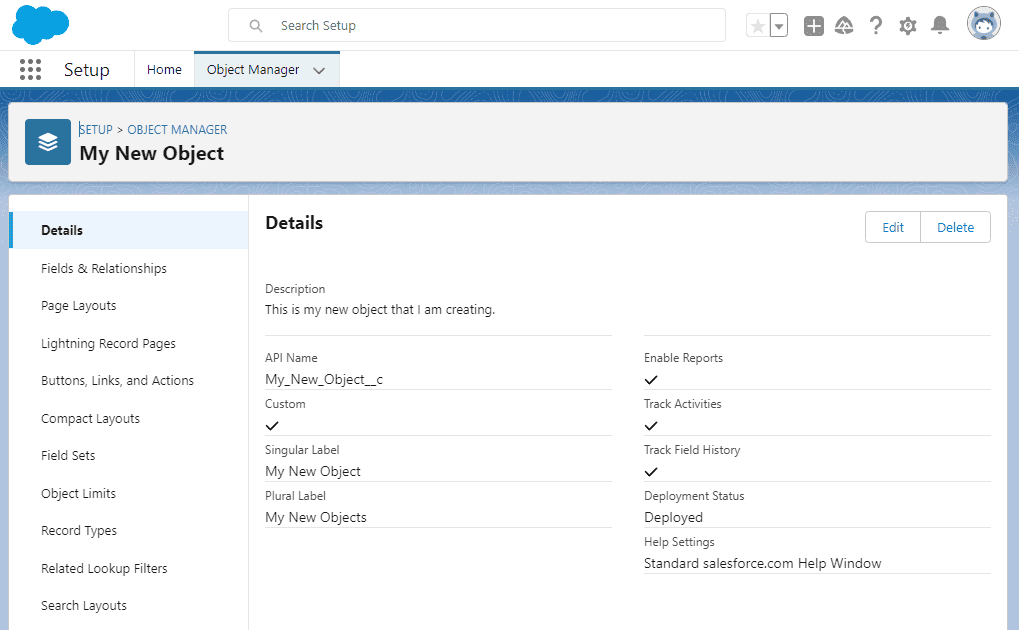
At this point, your new Object is not ready to have data entered as you have not added the fields you want and need to store data for the records you will be adding.
The next step is to figure out what data points you need to capture for the records you will be creating for this Object and then add the fields you want and need.
All new objects include some default metadata fields which are required to help Salesforce manage the object, but any further fields you want to store your specific data will need to be added manually.
Creating New Fields On A Salesforce Object
New fields can be added to custom and standard objects and can be configured for a variety of different data types.
The details and characteristics of every different field type are not covered in this resource but can be viewed in this Salesforce Help Article.
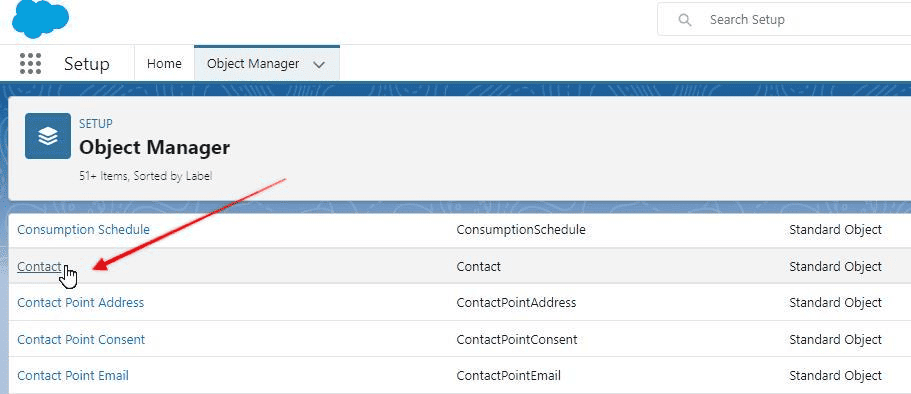
For demonstration purposes, I am just going to create a new text field, on the standard Contact object, but this same process can be used to create any type of new fields on standard and custom objects.
Go to the Object Manager. This can be accessed by choosing the gear icon in the top right corner of the screen selecting Setup, and then navigating to Object Manager.
Select the object to which you want to add a field (the Contact Object in my case).
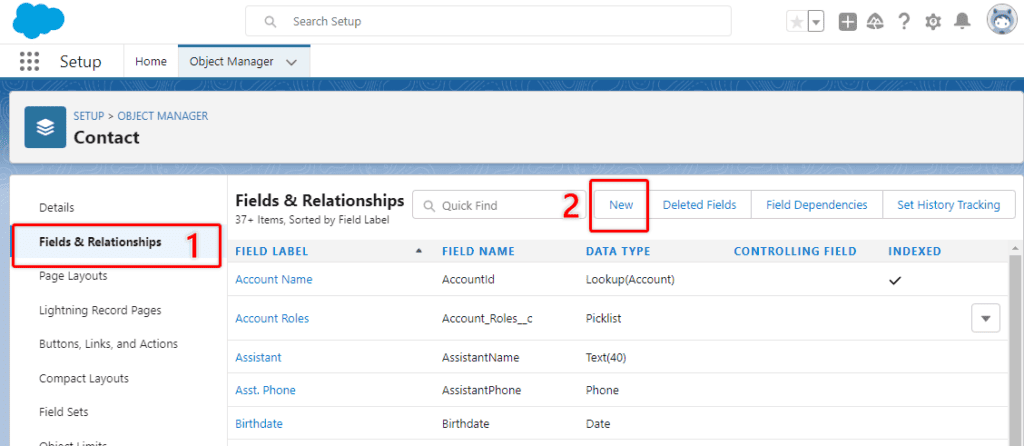
Select Fields & Relationships in the left-hand menu, then New.
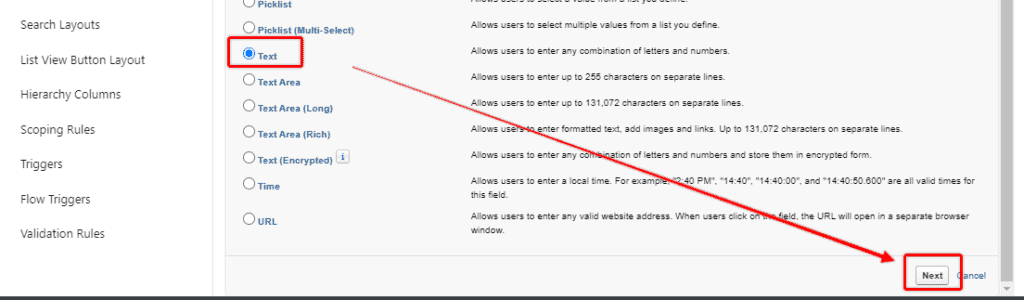
Choose the type of field you want to create, “Text” in my case, and then follow the prompts to enter the field label and other required information, such as the field name, data type, and length.
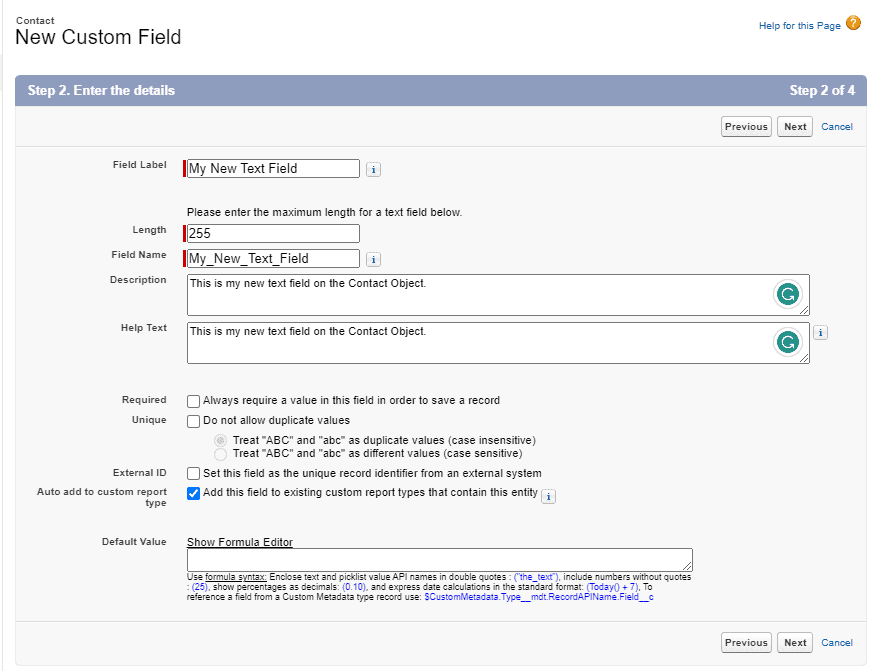
Set any additional field properties, such as whether the field is required or unique, which user profiles it should be available for, and whether it should appear on page layouts or in search results.
Select Save to create the new field.
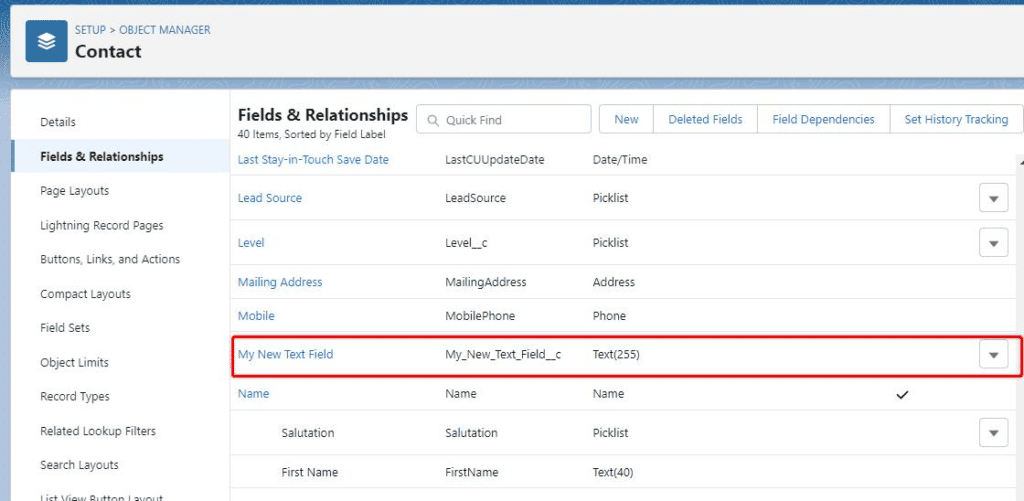
Now when I view the Fields and Relationships of the Object I just added my field to, I can see it listed.
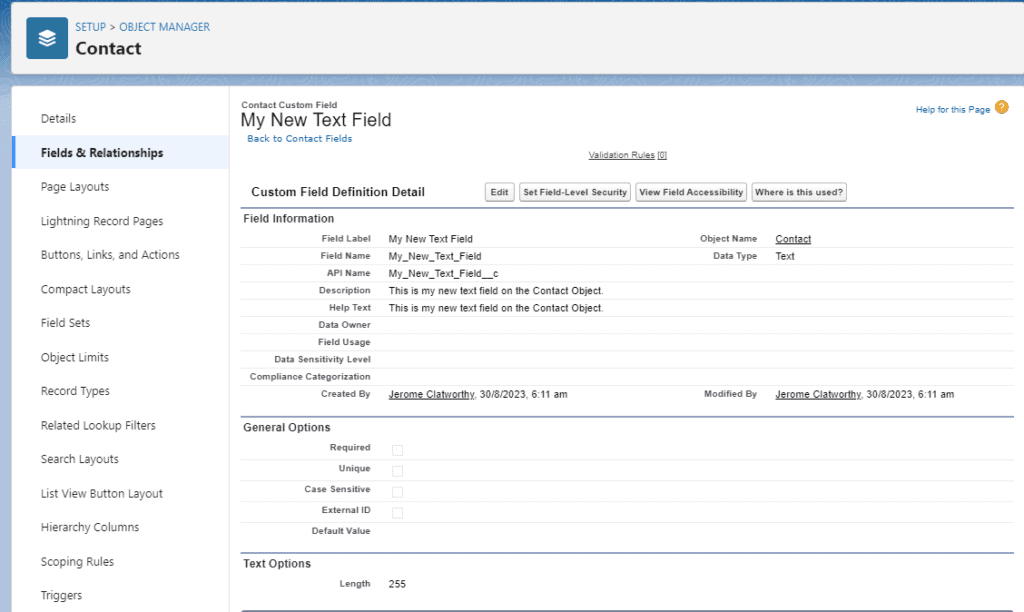
If I change my mind later on about the field label or configuration I can go into the field details and adjust.
New Custom Object Tab
In Salesforce, an object tab is a user interface element that allows users to access a specific object in the platform. Object tabs are displayed at the top of the page in the Salesforce user interface, and selecting a tab, takes the user to the corresponding objects home page.
Object tabs are created automatically for standard objects, such as accounts, contacts, and opportunities, and can also be created manually for custom objects.
Object tabs provide a convenient way for users to navigate between different objects in the platform, and are essential for managing and working with data in Salesforce.
They can be customized to control the visibility and order of tabs, as well as the fields and related lists that are displayed on each object’s home page.
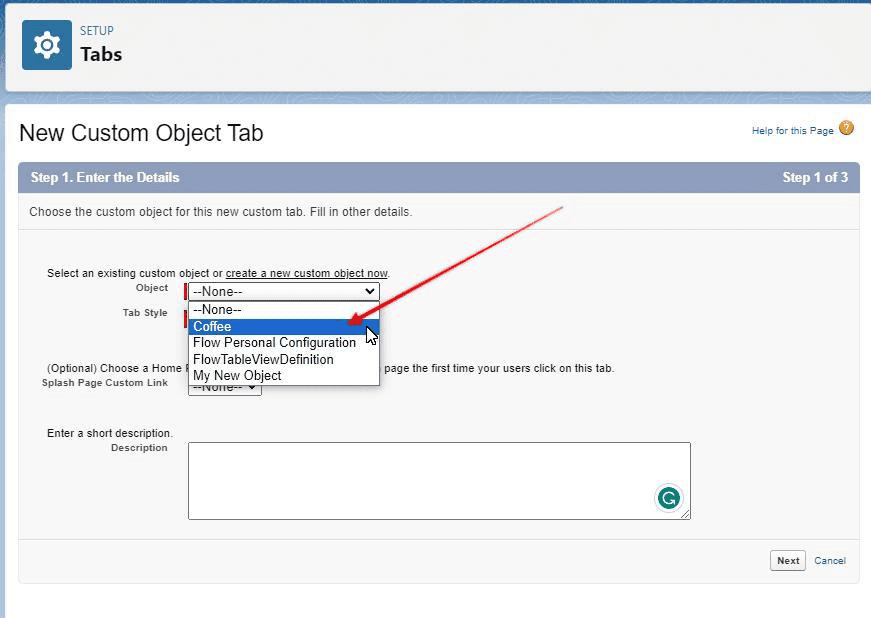
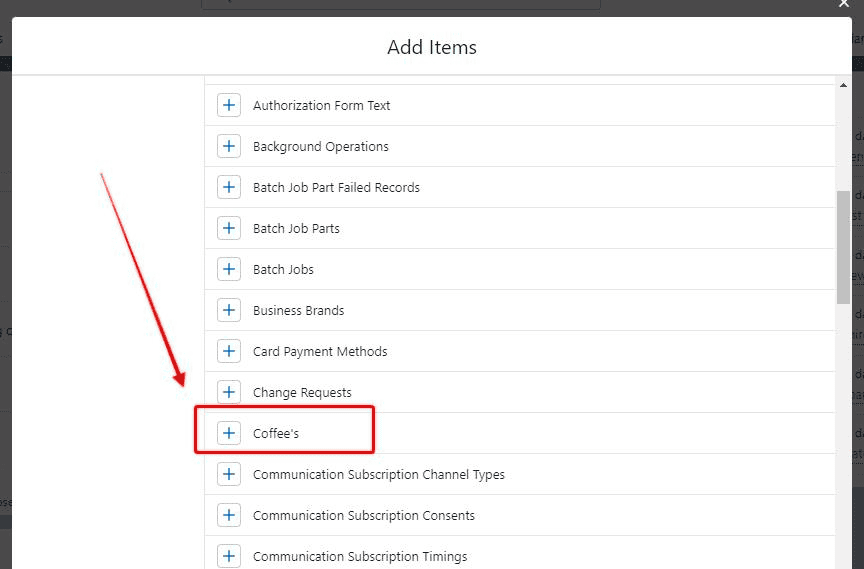
To demonstrate this process, I have created a new custom Object called Coffee, added some records, and I would now like to create an Object tab, for this new Object, and have it visible as a tab in the Sales app.
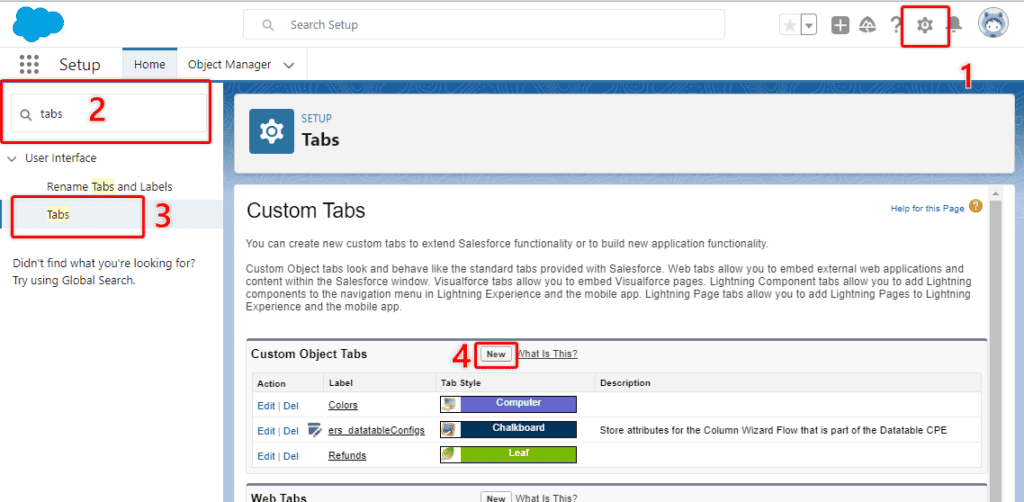
The first thing I need to do is create a custom Object tab, by opening Salesforce Setup, searching ‘tabs’ in the quick find box, selecting Tabs, and then choosing New.
I will choose my new ‘Coffee’ Object from the list.
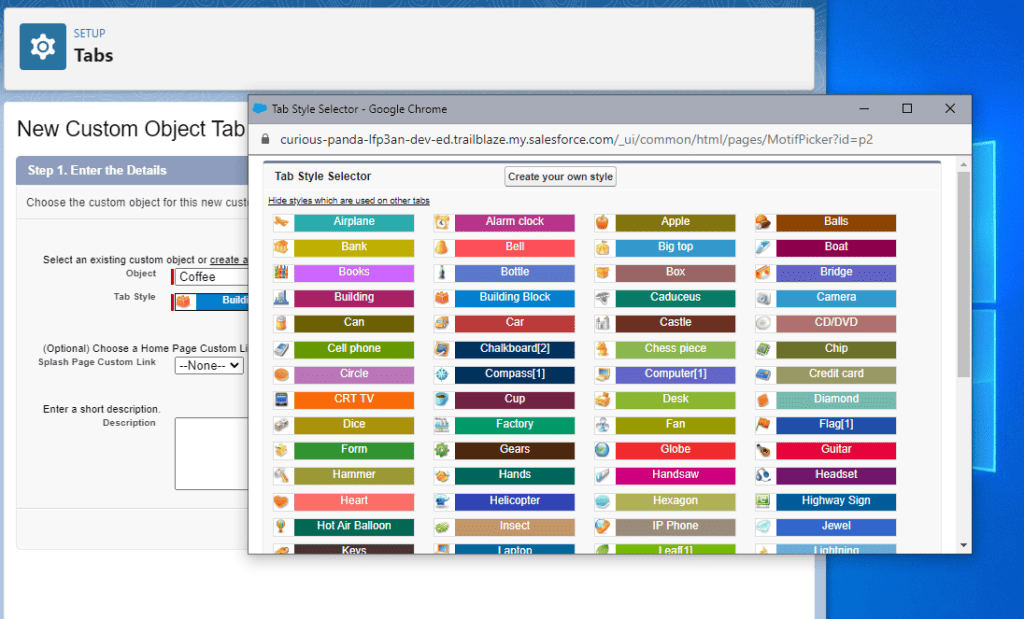
Choose a tab style to give the tab a color scheme, add a short description, and then choose Next.
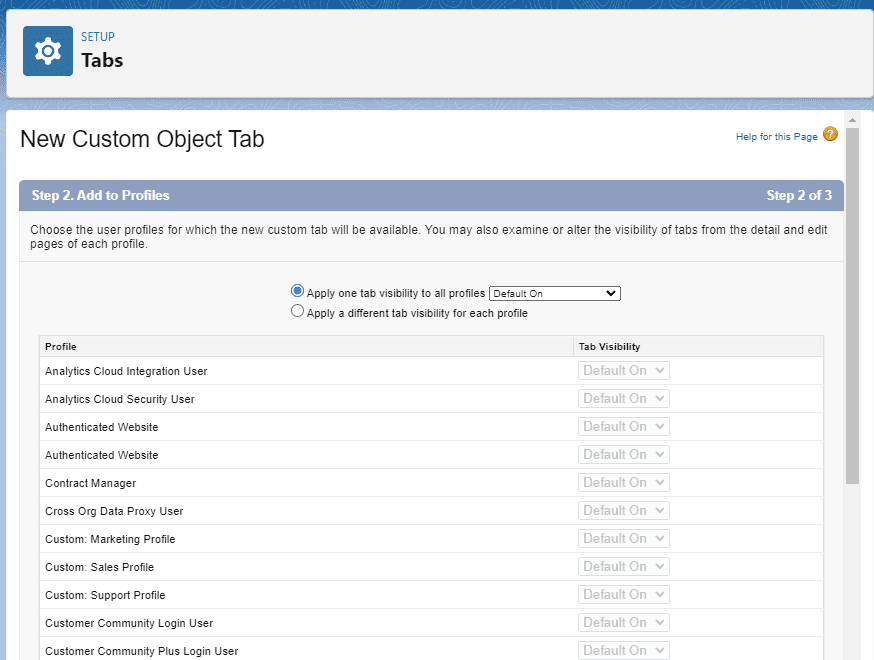
Select which User Profiles you want your tab to be visible for.
Then choose which Apps you want the tab to be available in. Press Save to complete.
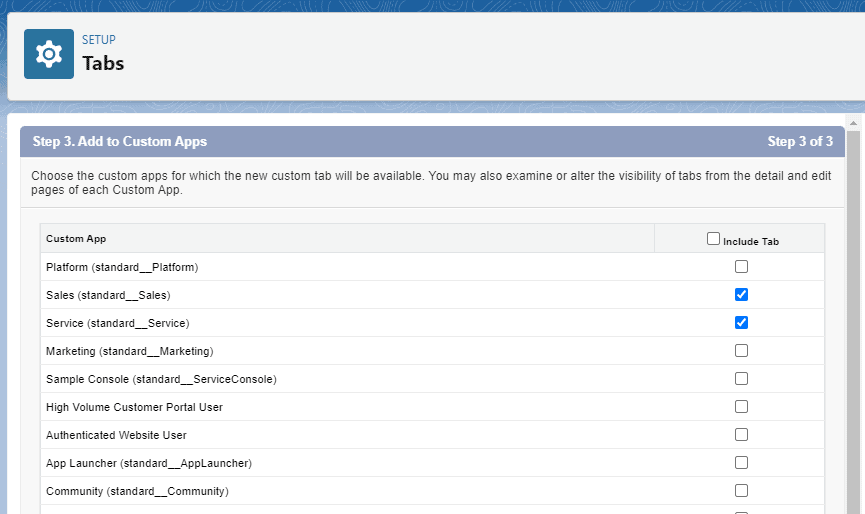
Depending on the Visibility settings you configured the new tab might be visible straight away, or you might need to add it manually by personalizing your nav bar.

Choose Add more Items.
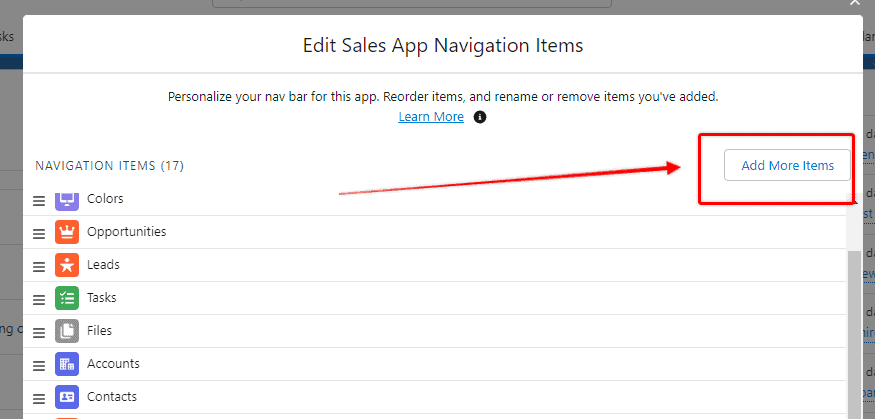
Add your new tab, order it how you prefer, and save the changes.
My new tab is now visible and I can view all Coffee records with the Sales app.
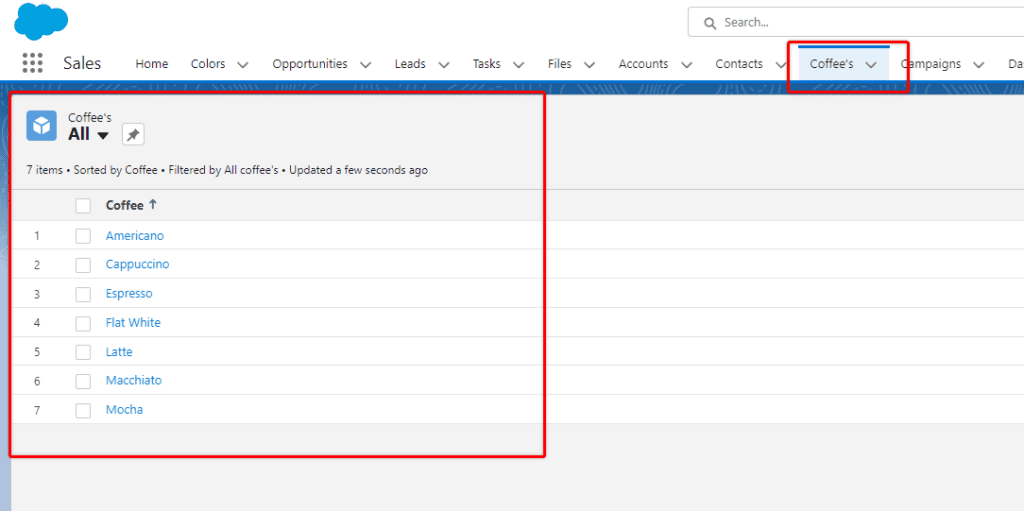
(Of course, there would not usually be a need to add a Coffee object, and add it to the Sales app, it was just an example for demonstration purposes.)