The Data Import Wizard is a Salesforce tool that allows you to easily import data from external sources into your Salesforce org. It is accessible from the Setup menu in Salesforce.
In this article, I will demonstrate how to use the Data Import Wizard to import data in Salesforce.
I have a CSV file with some fictional Accounts that I will add to a Trailhead Playground Org and demonstrate each step with explanations and screenshots.
Table of Contents
1. Open Data Import Wizard
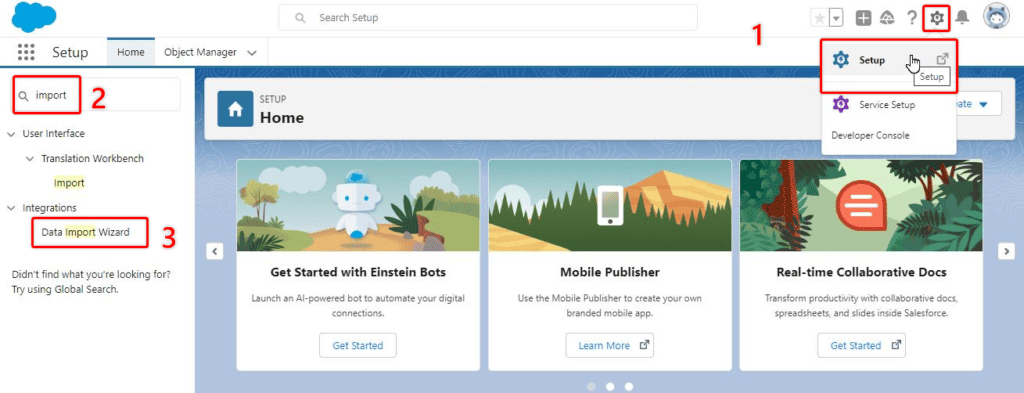
Open Data Import Wizard by selecting the gear icon, opening Salesforce Setup, typing Import in the quick find box then choosing Data Import Wizard.
RELATED RESOURCE: Getting Data In And Out of Salesforce
2. Launch The Data Import Wizard

3. Choose Import Type & Upload Your Data
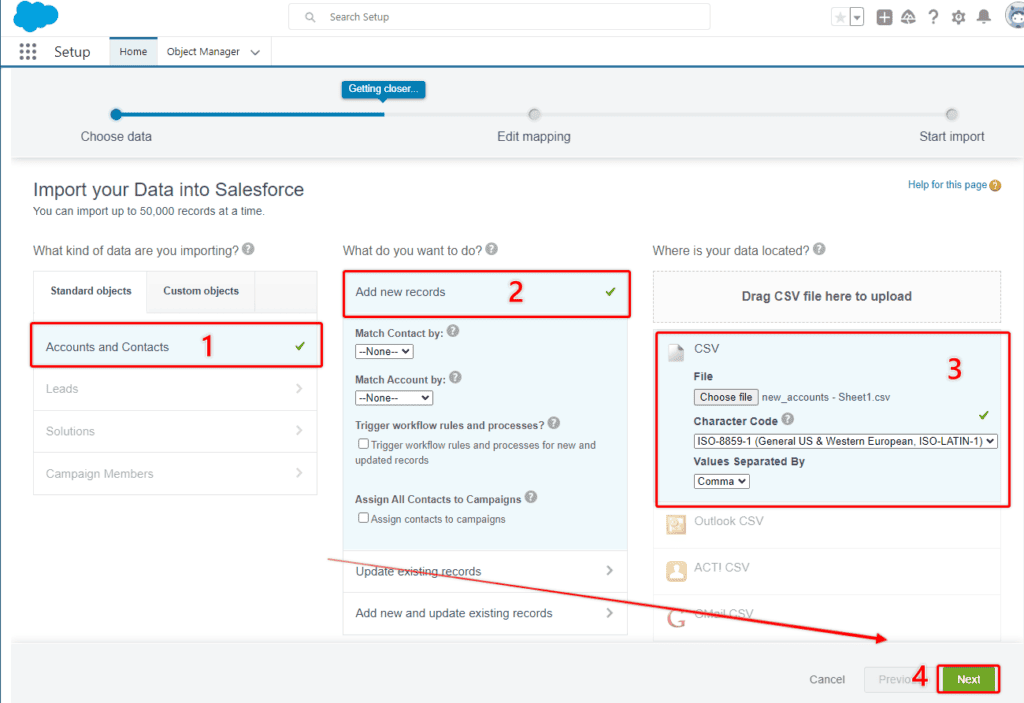
Select the kind of data you want to import from the available objects (only certain standard objects are available in the Data Import Wizard but all custom objects are available).
Once you have chosen your object, indicate whether you want to add new records, update existing records, or add new records and update existing records in the same import (this is called an ‘Upsert’).
Deleting records IS NOT possible with the Data Import Wizard.
Once you have selected what you want to do, you have to provide the data. In this case, I will be uploading with a CSV file.
RELATED RESOURCE: Getting Data In and Out of Salesforce
4. Map Salesforce Fields
Now that I have confirmed what I want to do, and provided a data source, I need to map the fields from my CSV to the relevant Salesforce Account object fields.
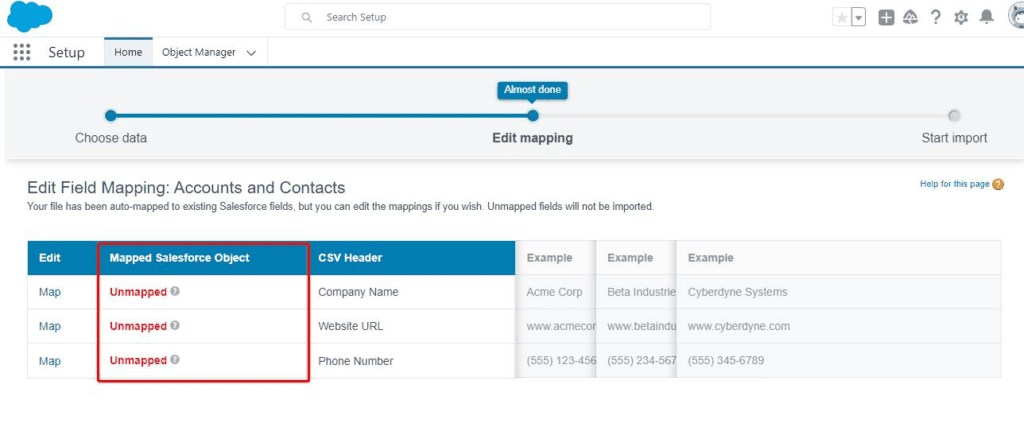
Select Map and choose the corresponding Salesforce field, before selecting Next.
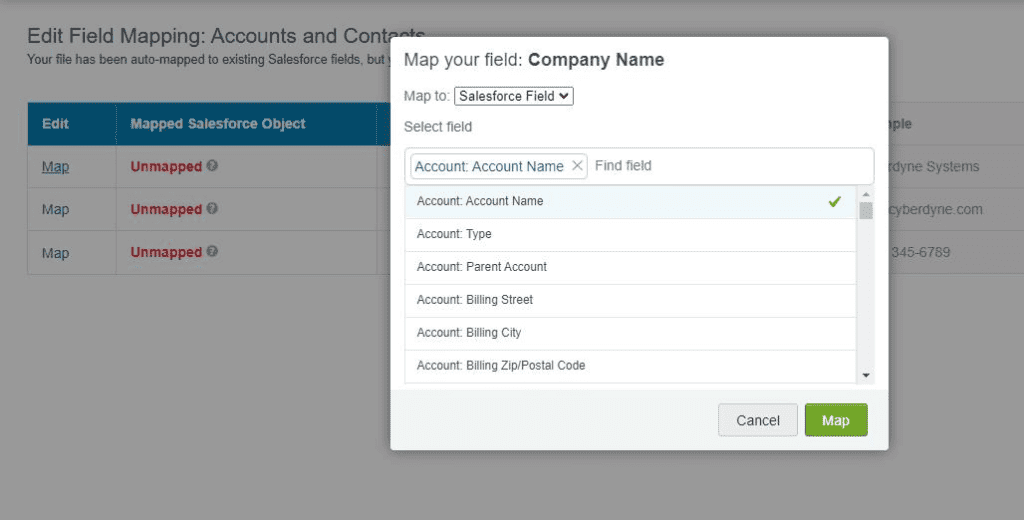
You can change the mapping at any time, by selecting Change on the desired field.

5. Start The Import
Once all fields have been mapped you can start the import.
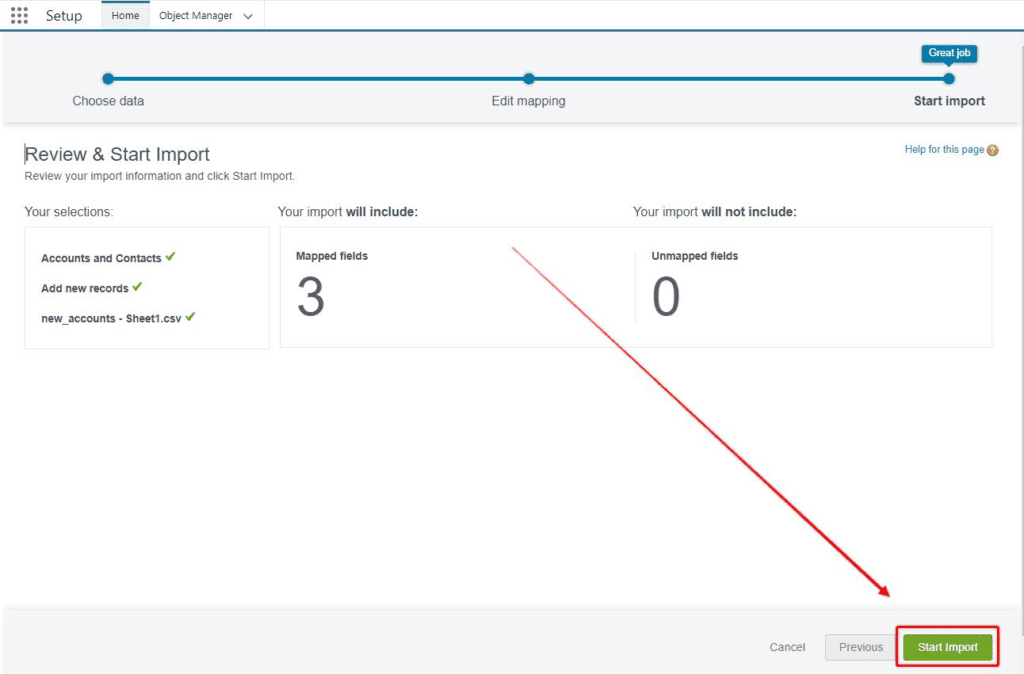
You will get a confirmation message that the import has begun successfully. The results of your import can be viewed on the Data Import Wizard home screen.

6. Check The Import Results
On the Data Import Wizard home screen, you can view the status and result of your import job. Given the small number of records (10) I processed on this import job, it was done instantly and available for review.
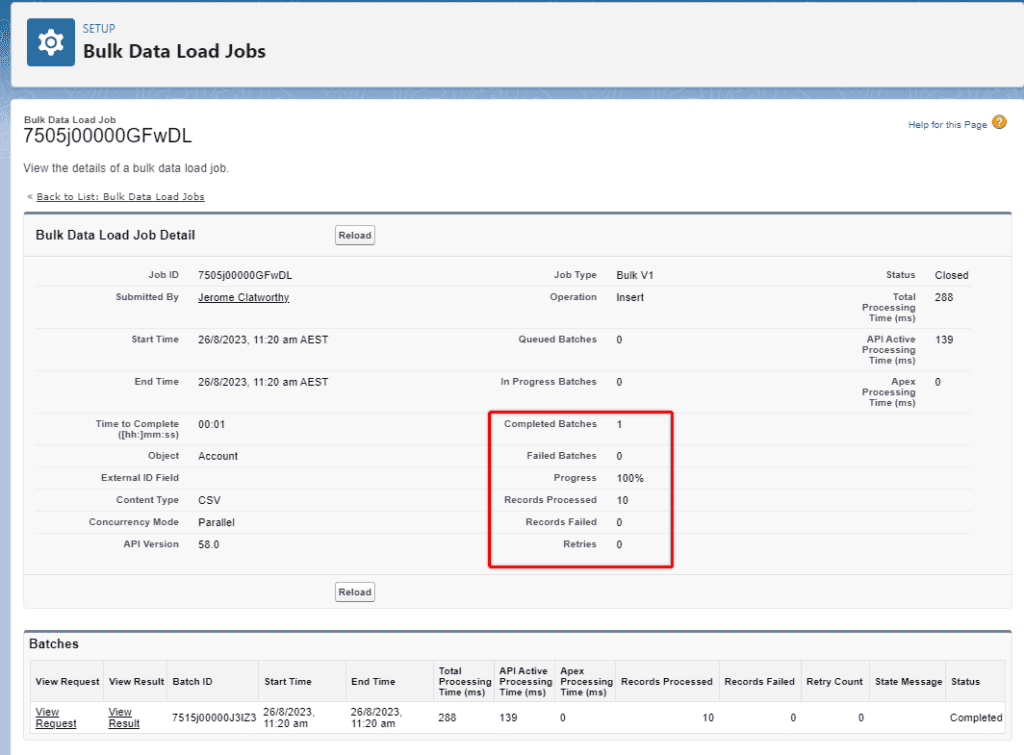
The key things to view are the progress percentage, the number of records processed, and the number of records that failed.
7. View Your New Records
The last thing to check is to go back to your import Object to make sure the new records are visible.
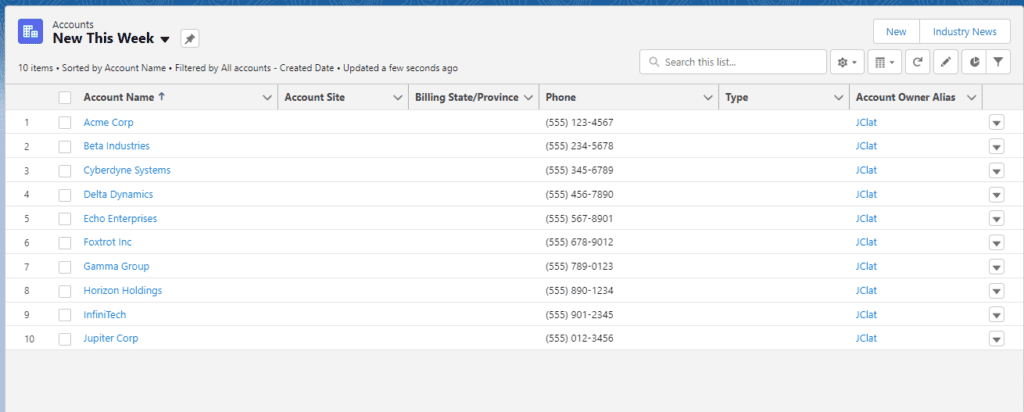
Look at a list of new Accounts, the 10 records I imported are displaying correctly.
