Workbench is an online tool for managing Salesforce data that allows you to easily import data from external sources into your Salesforce org. It is a web-based tool available for use at no cost.
In this article, I will demonstrate how to use Workbench to import data in Salesforce.
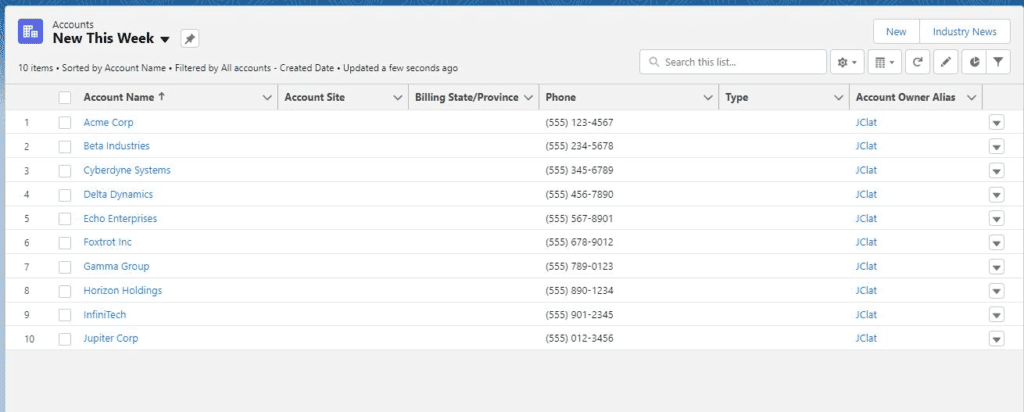
I have a CSV file with some fictional Accounts that I will add to a Trailhead Playground Org and demonstrate each step with explanations and screenshots.
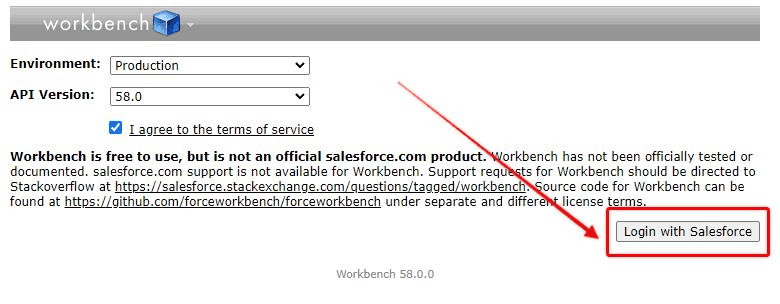
1. Login to Workbench
Open your web browser, navigate to https://workbench.developerforce.com/login.php, and log in with your Salesforce Org credentials.
RELATED RESOURCE: Getting Data In And Out of Salesforce
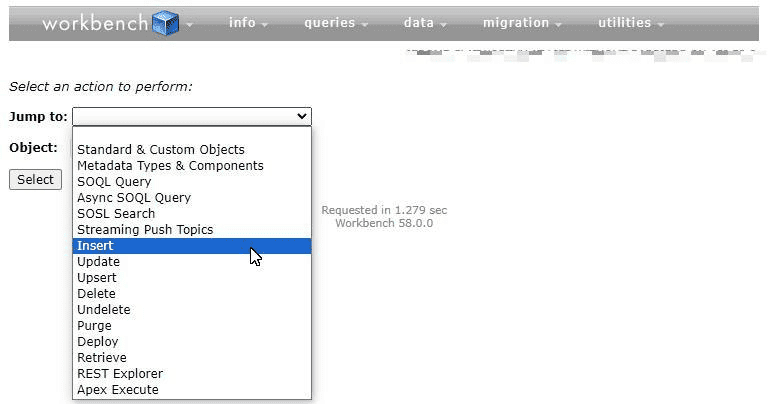
2. Insert New Records
From the Jump to menu, select Insert and then choose the Object you want to import new records into.
In this case, I am going to import a list of 10 new fictional companies into the Account Object.
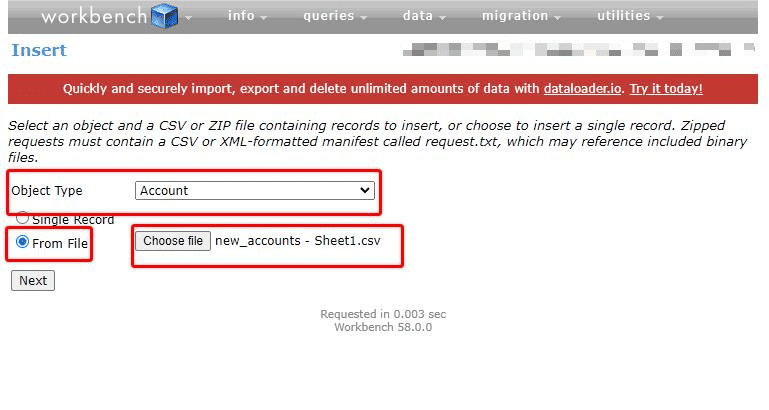
Select the File Insert type, and upload the CSV file with new records that you want to Insert.
RELATED RESOURCE: Connect Workbench To Trailhead Playground
3. Map CSV Fields to Object Fields
Use the drop-down boxes to align each CSV field with the corresponding Object field.
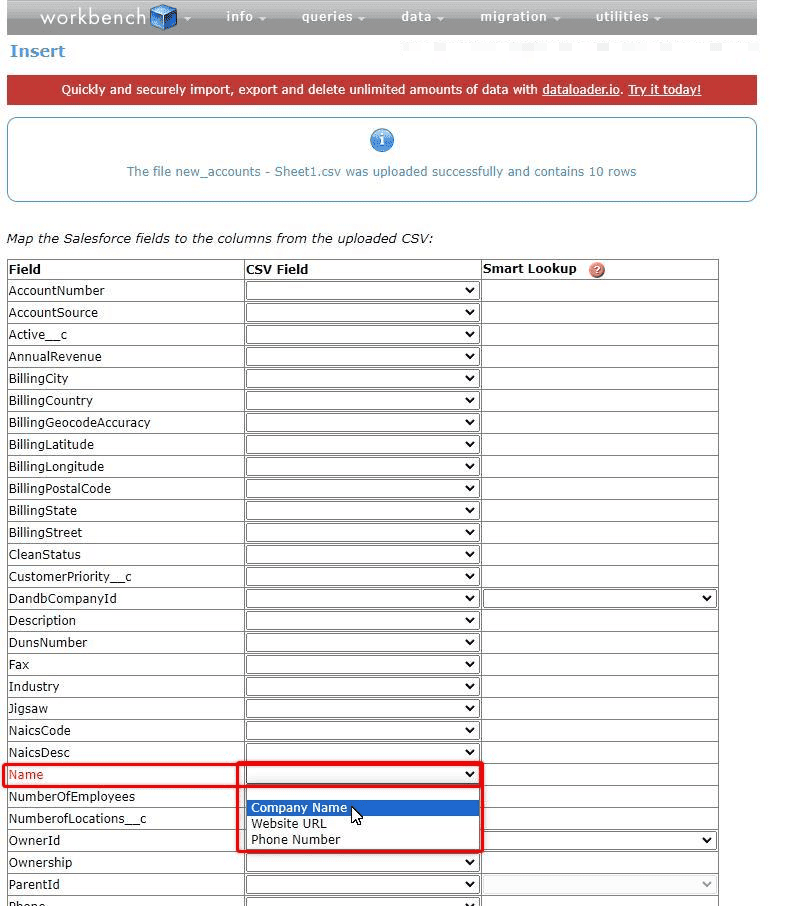
After each field from your CSV has been mapped accordingly, select Next.

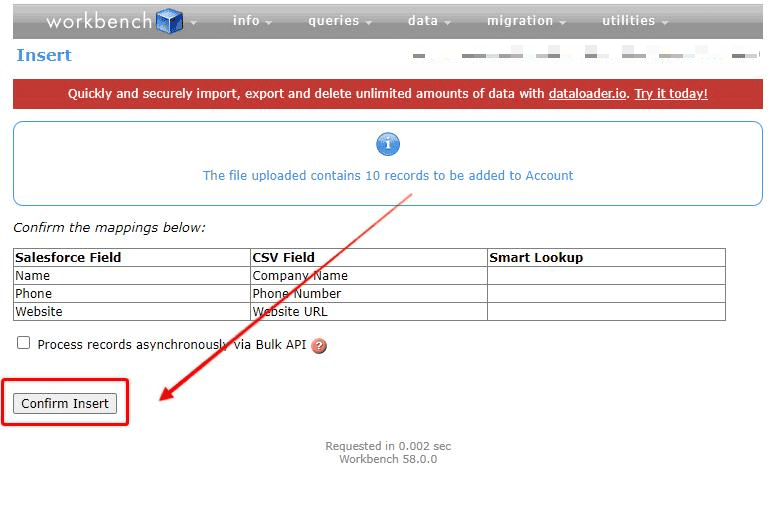
Confirm the field mapping, and number of records, and select Confirm Insert.
4. View Import Results
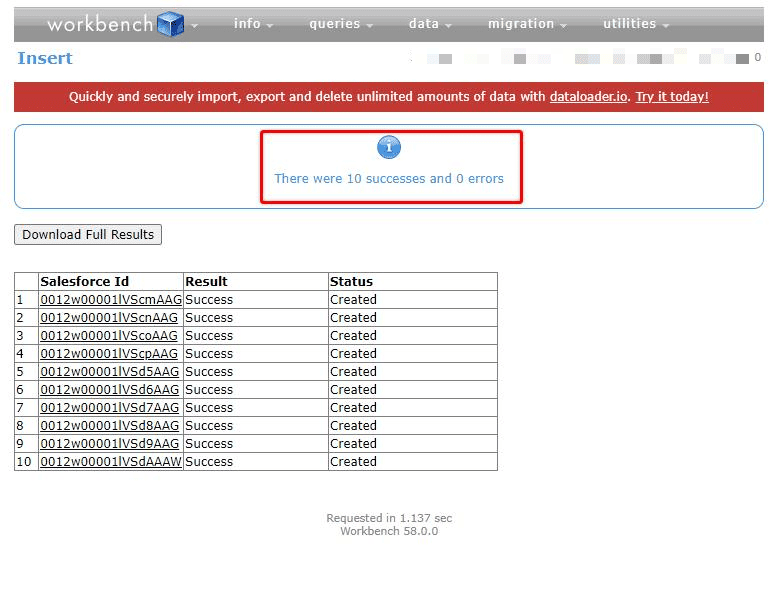
A result screen will appear giving you an overview of the success of the Insert operation and a link to a complete results report will be available for download.
5. Check the New Records in Your Salesforce Org
Do a final check of the Insert operation by navigating to the relevant Object in your Salesforce Org and viewing recently added records.