Salesforce Apps are good ways to make your end user’s time in Salesforce efficient and easy.
You can add the required objects and links, minimizing the time users need to spend moving from one part of the program to another.
This article goes through the process you need to follow to create a new Salesforce App with step-by-step instructions and screenshots for each step.
If you would like to customize an existing Salesforce app, you can follow these instructions.
Table of Contents
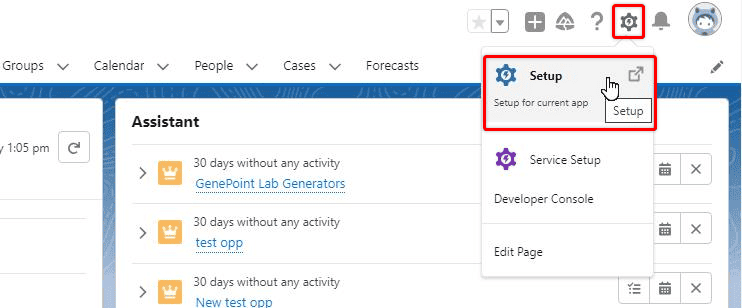
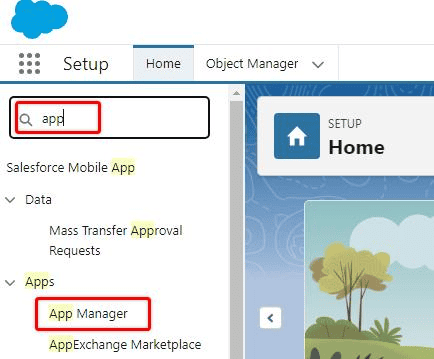
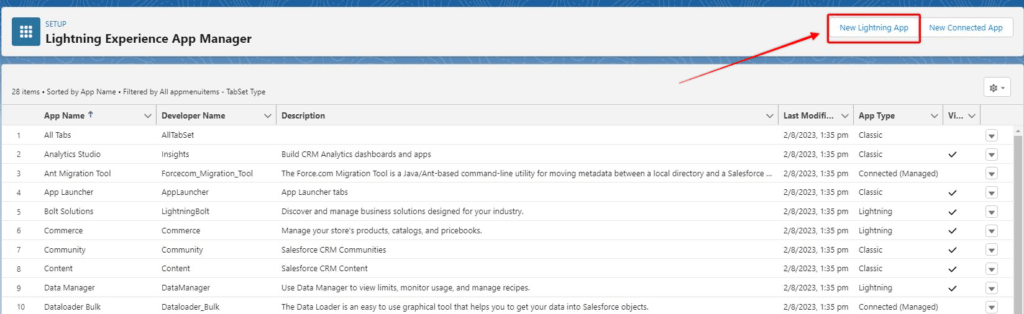
1. Open The Lightning Experience App Manager
Lightning Apps are edited with the ‘New Lightning App’ wizard. To open the wizard, go to Setup, search ‘App’ in the Quick Find box, open App Manager, and click ‘New Lightning App’.
RELATED RESOURCE: How To Customize The Look And Feel of Salesforce
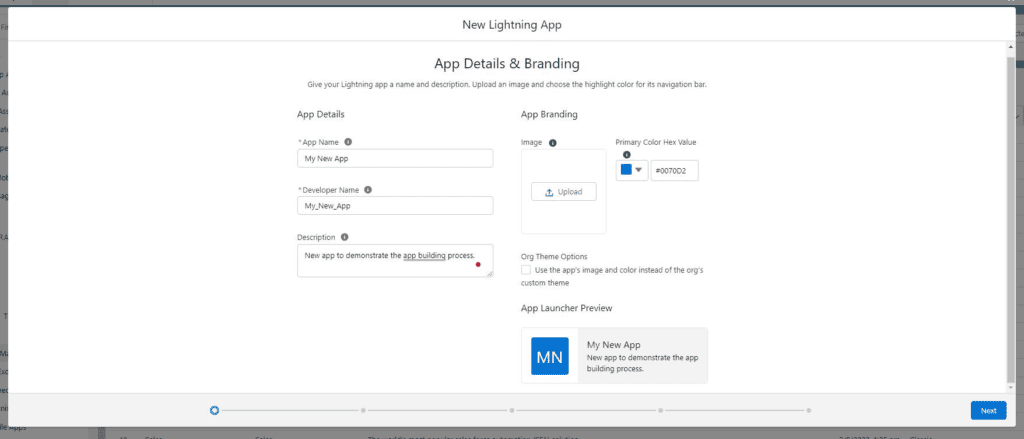
2. Configure App Details & Branding
On the App Details & Branding tab, you can determine the app name, description, image, and icon color. A preview will be displayed showing how your app will appear in the App Builder search results. When happy with the configuration, click ‘Next’.
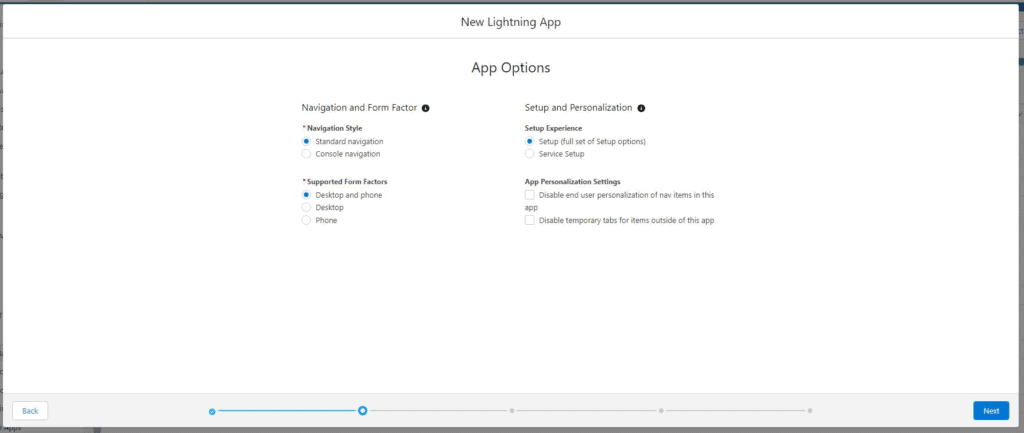
3. Configure App Options
On the App Options tab, you can set the app navigation style, supported form factors, setup experience, and personalization settings.
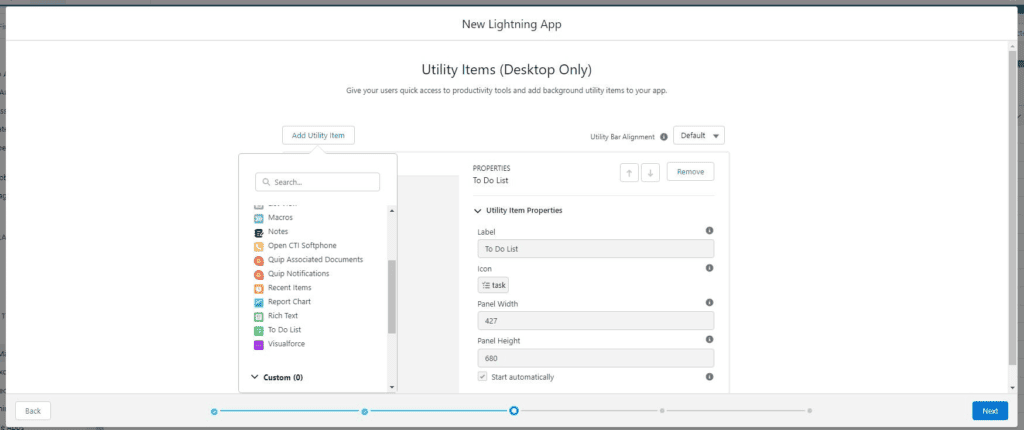
4. Configure App Utility Items
On the Utility Items tab, you can add shortcuts that appear at the bottom of the screen on the app. These are only visible on the Desktop view of Salesforce, not the Mobile view. From the availability of Utility items, I elected to add a To Do list on this app.
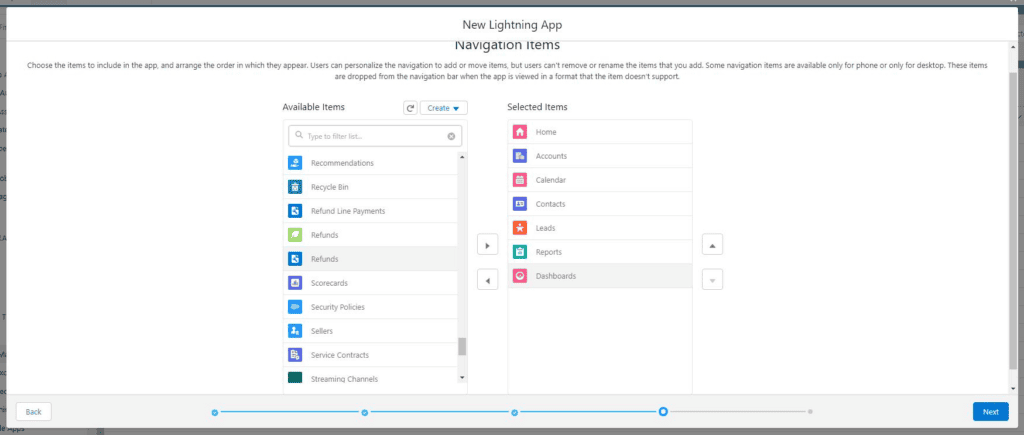
On the Navigation Items tab, you can select which objects and items are available to be available on the Navigation Bar of the App. I added links to the main Salesforce objects, as well as access to Reports and Dashboards given how often they are used.
6. Configure App User Profiles
On the User Profiles tab, you choose which Salesforce User Profiles can access this app. You can add/remove any Salesforce User Profiles. If a profile is not on the ‘Selected’ list, they will not be able to find this app in the app explorer. Once the desired profiles have been configured for your app, select ‘Save & Finish’.

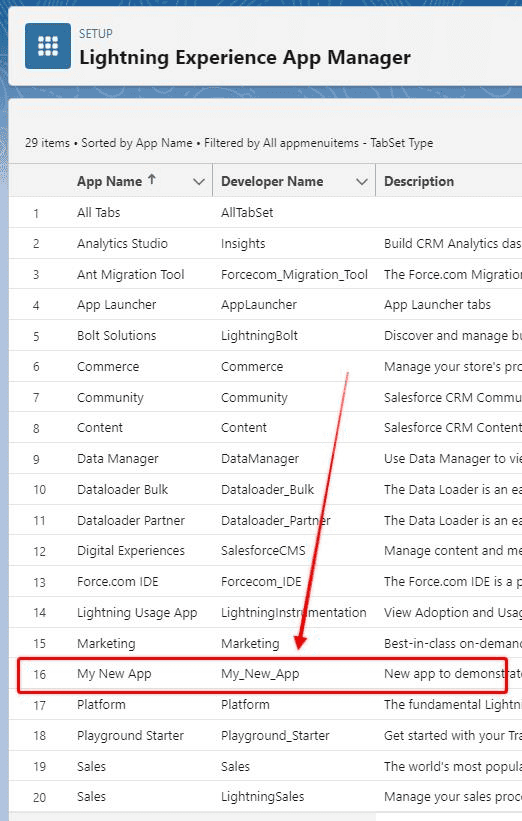
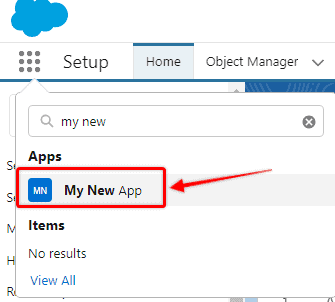
My app is now available in the list of Apps. Next up is to Search for it from the App Launcher and see what it looks like.
7. Opening Your New App
Once you have saved your new app, you can search for, and open it from the App Launcher:
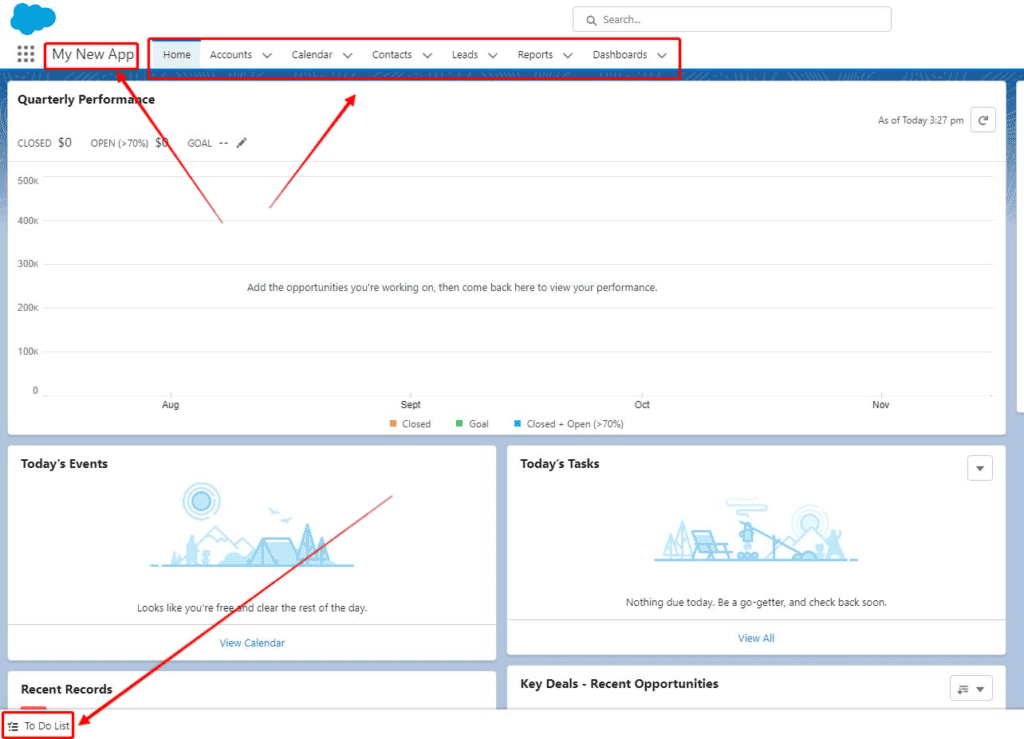
I can see the name I created, with the relevant Navigation items, and the Utility item (To-Do List) at the bottom.